As fall is approaching, personalized embroidered sweatshirts and sweaters will become more and more popular. Recently, a picture of an embroidered sweatshirt caught my eye on Facebook. The sweatshirt contained a perfectly cut felt name with hand stitching on top. I immediately thought of ways we can have this same look but using our embroidery and cutting machines. I reached out to my friend Lyndsie at Lynnie Pinnie and asked if she had any pretty script fonts that looked like hand stitched embroidery. Not only did she have exactly what I wanted, but she also had a new applique font that had a very similar look as to what I was going for!
You can grab the newly released fonts from Lynnie Pinnie at 60% off right now and I have a coupon for you to get 50% off everything except new releases.
I will be going over several ways that you can get this look and using my new Brother PRX1 embroidery machine to stitch out a sweatshirt.
Supplies Needed:
- Fonts to try
- Hand Stitched Ribbon Font
- Chain Stitch Ribbon Font
- Stitchy Applique Font
- Use coupon code KARLIE to save 50% off everything except new releases
- Sweatshirt
- Craft Felt
- Fabric Marker Use coupon code “karliebelle” to save 10%
- No Show Poly Mesh stabilizer, choose Fusible No Show in the size you want. Use coupon code “karliebelle” to save 10%
- Cut Away Stabilizer Use coupon code “karliebelle” to save 10%
- Heat n Bond Lite Use coupon code “karliebelle” to save 10%
- Cricut Mini Easy Press
- Applique Scissors Use coupon code “karliebelle” to save 10%
- Organ 75/11 BP Needles Use coupon code “karliebelle” to save 10%
- Precision Tweezers Use coupon code “karliebelle” to save 10%
- Embroidery Thread Use coupon code “karliebelle” to save 10%
- Bobbins for Free Arm Machines Use coupon code “karliebelle” to save 10%
Video Tutorial
In this detailed tutorial, you’ll learn how to create a professional-looking felt applique sweatshirt using your embroidery machine and various techniques, including cutting machines, applique fonts, and more.
Inspiration and Design Options
When it comes to creating personalized embroidered sweatshirts, the possibilities are endless. Here are some inspiration and design options to get you started:

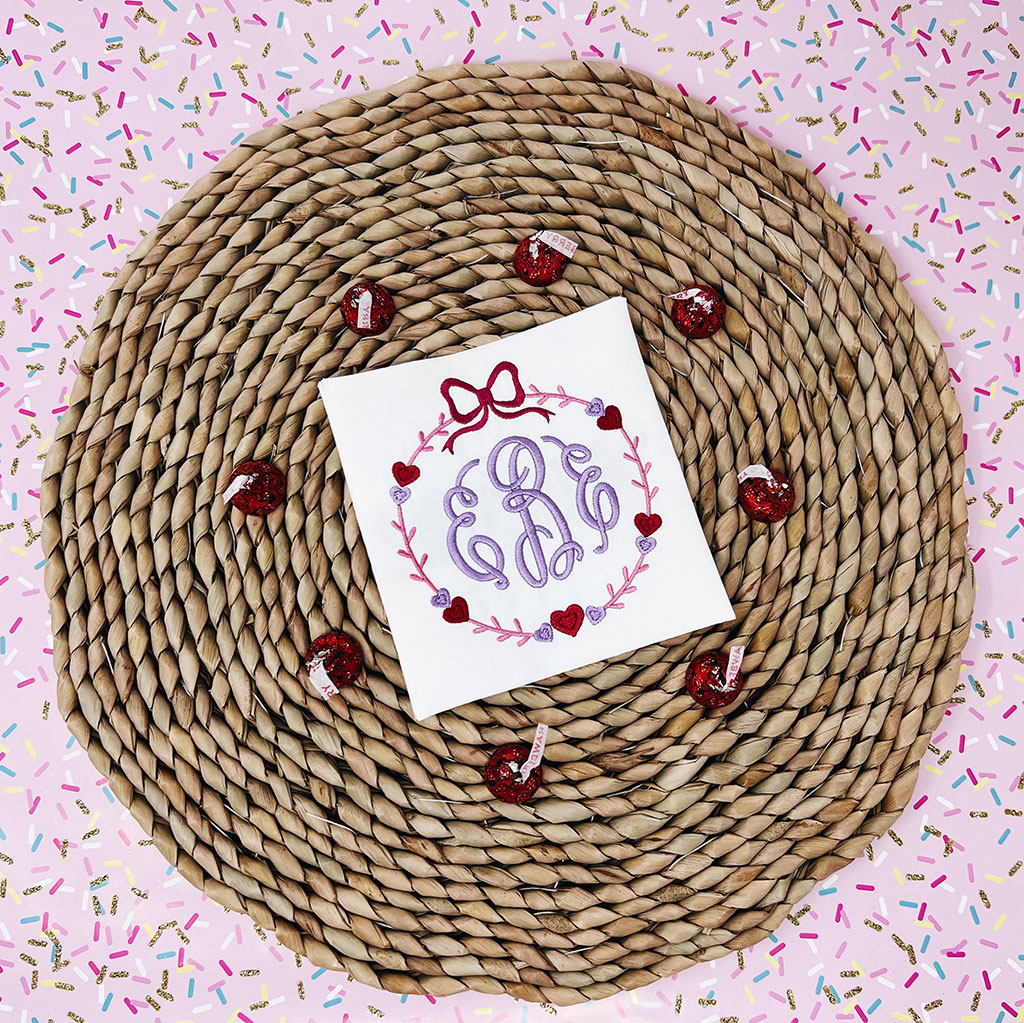
The above picture is the one I saw on Facebook and was the inspiration for this project. These are hand embroidered shirts from the Etsy Shop TheBloomingBike, and they have beautiful things in their shop! My goal was to see if I could recreate this look using my embroidery machine instead of hand stitching and use my cutting machine to cut the felt perfectly.
Hand Stitched Look Fonts
For that authentic hand-stitched appearance, consider using fonts specifically designed to mimic hand embroidery. Look for fonts that are versatile and can be resized to achieve the perfect look for your sweatshirt. The one shown above is a chain stitch font from Lynnie Pinnie. They also offer a hand stitch font similar to my inspiration photo.
Applique Techniques
Explore different applique techniques to create unique designs on your sweatshirt. From felt applique to fabric applique, there are various methods to add texture and dimension to your embroidery. I love the look of felt and found some great options on Amazon to get a soft, heathered looking felt. However if you would like to use a different material for your applique, there are tons of options. Just remember to use Heat n Bond Lite to get the best finished look and prevent fraying of edges after trimming.
Cutting Machine Option
If you have a cutting machine, you have the advantage of creating intricate designs for personalized embroidered sweatshirts. There are a few options available depending on the cutting machine you have:
Silhouette Cameo or Brother Scanning Cut
If you own a Silhouette Cameo or a Brother Scan N Cut, you can easily import your embroidery design into the software and create a cut line to go around it. The software is designed to allow you to customize and manipulate the design before cutting it out, providing you with the flexibility to achieve the desired look for your sweatshirt. For Silhouette, you will need the Business Edition of the software to import a .PES file.

Cricut or Other Cutting Machines
If you have a Cricut or any other cutting machine, while it may not directly support embroidery designs, you can still explore options to make it work. There may be some limitations and challenges, but experimenting with different software and techniques may yield favorable results. Keep in mind that it might require additional effort and experimentation to achieve the desired outcome.
Embroidery Machine Only Option
For those who prefer using an embroidery machine exclusively, this method offers a seamless way to create personalized embroidered sweatshirts without the need for a cutting machine. Here’s a breakdown of the process:
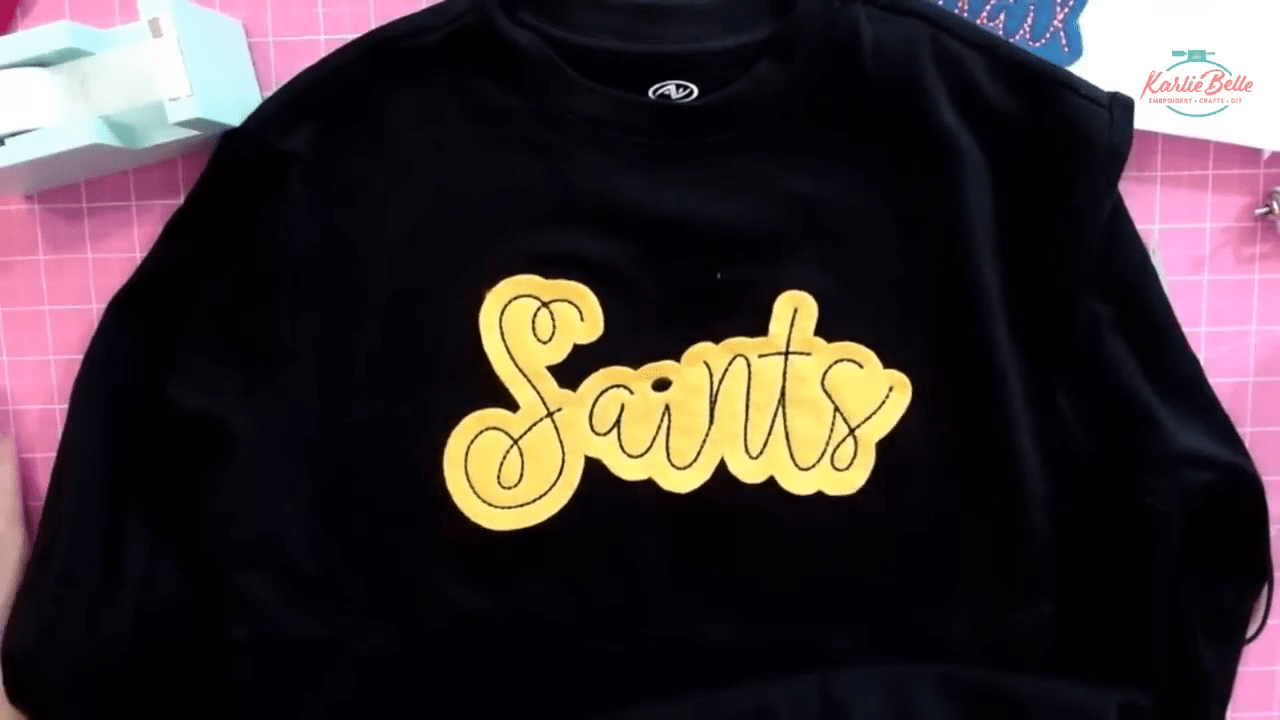
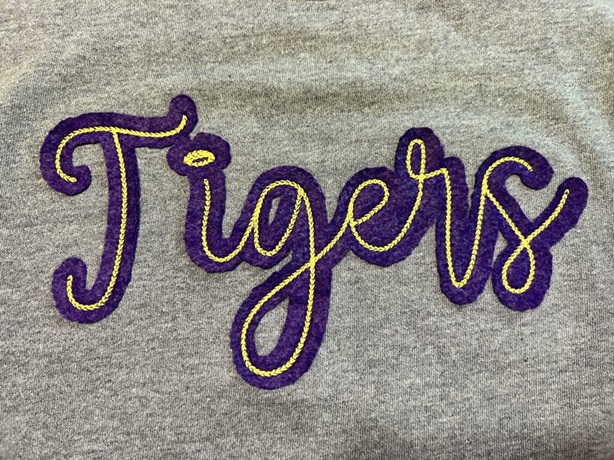
Stitchy Applique Font
The Stitchy Applique Font from Lynnie Pinnie is a fantastic option for achieving a hand-stitched embroidery look. This font is specifically designed to mimic hand embroidery, offering a beautiful and authentic appearance for your personalized embroidered sweatshirts.
With the ability to resize and customize the font, you can achieve the perfect look for your sweatshirt designs. The Stitchy Applique Font provides versatility and elegance, allowing you to create stunning and personalized embroidered sweatshirts with ease.

This new font allows you to connect cursive lettering seamlessly. The font comes in a native BX format and has instructions on how to enter the lettering design so that all of the letters connect correctly. This allows for applique using felt without needing a cutting machine. Simply trim the felt around the letters. The finished product gives a handmade look very similar to my inspiration photo.

You can choose to trim very close to the outline stitching, or you can create a bubble like effect by trimming around the entire image.

Other Font Options
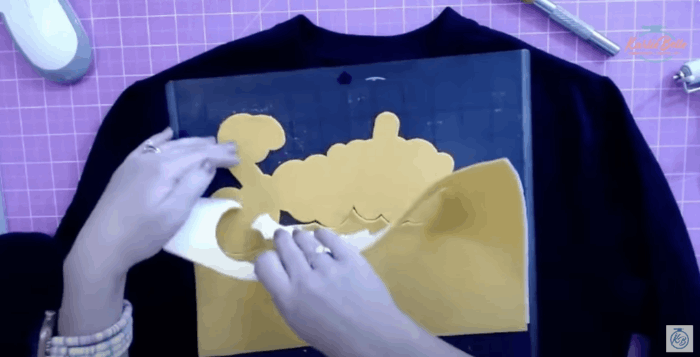
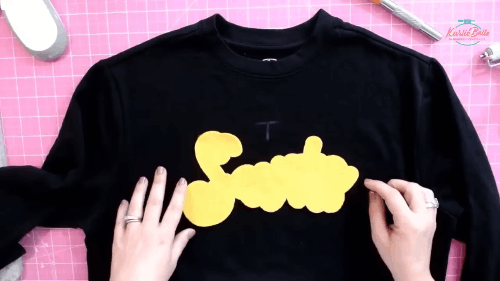
If you do not have a cutting machine and want to try the look of an applique cloud/ bubble of felt under a name, you can achieve this look using any font you would like. Simply prep the felt with Heat n Bond Lite, then lay it on top of the sweatshirt before you start stitching. After the name or design is done stitching, use applique scissors to trim the felt in any shape that you would like. Once you are done, carefully iron the felt, which will activate the Heat n Bond Lite and allow it to adhere to the sweatshirt.
Stitching the Sweatshirt
When it comes to creating personalized embroidered sweatshirts, there are various methods to achieve the desired look. One such method involves using a cutting machine to create intricate designs for personalized embroidered sweatshirts. Here’s a step-by-step guide to stitching a sweatshirt using this method:
Creating the Cut File for the Felt
If you have a cutting machine, such as a Silhouette Cameo or a Brother Scan n Cut, you can create the cut file that goes around the lettering design you have created in Embrilliance. Just open the .PES file in the cutting software and create an offset in the size of your choice.
Aligning the Design
There are 2 option for ensuring your lettering design stitches correctly on your pre-cut felt. My first attempt involved actually stitching the lettering design twice. The first time served as a placement stitch to help me figure out right where I should place my felt. Because my font was not dense, I didn’t think it would effect the sweatshirt to stitch it twice. However, if you are using a satin stitch font, I would not recommend this method.
Another option, which I think is better now that I think about it 😆, is to print out the design and use it as a guide to position your felt on the sweatshirt. Cut the design out of the paper printout, then place it one top of the pre-cut felt. You should be able to see the outline of the felt through the paper so that you can align it properly. You can pin or tape the paper & felt on top of the sweatshirt, aligning it with the placement marks. This method allows you to ensure that the felt is positioned accurately before stitching, eliminating the need for multiple stitching attempts. Just remove the paper print out after you have your needle aligned to the placement marks but before you start stitching.
Stitching the Design

- Once the felt is in place, stitch the design using your embroidery machine.
- After stitching, carefully trim away any excess stabilizer, ensuring that the sweatshirt remains unharmed during the process.
- Iron, or heat press the felt, using a sheet of parchment paper or teflon, to activate the Heat n Bond Lite and adhere it to the sweatshirt.
Experimenting with different methods, such as using a placement stitch or aligning the design with a printed guide, can help you achieve the perfect personalized embroidered sweatshirt using a cutting machine and embroidery techniques.
Finishing Up

As we conclude our tutorial on creating personalized embroidered sweatshirts, I hope you’ve gained valuable insights and inspiration for your future projects. Remember, the key to achieving stunning embroidered sweatshirts lies in exploring different design options, utilizing the right tools, and experimenting with various techniques. Whether you opt for hand-stitched look fonts, applique techniques, or cutting machine options, let your creativity shine through in every stitch.
Pin This!

💻 Check out past Sip & Stitch projects
🪡 Learn more about my beginner course on machine embroider, From Start to Stitch
❤️ Join my Sip & Stitch Squad VIP Membership
🧵 Join my Facebook Group for discussion and help on machine embroidery and crafting
If you are interested buying a new embroidery machine, I have a direct contact at Sewing Machines Plus if you have questions or are ready to purchase and would rather talk to someone on the phone than purchase online. Email Jean at [email protected] your information and she will call you back and help you! Tell her Karlie Belle sent you 😘.
Thanks for stopping by!