Choosing embroidery machines for beginners is easier when you start with the projects you want to make. A machine that handles a small monogram may have all the stitching space you need, but embroidering a finished tote bag also requires room to position the bag and keep its other layers away from the needle.
The good news is that a flatbed machine such as the Brother PE770, PE800, or SE1900 can personalize a suitable tote. An embroidery riser creates clearance underneath the machine, while a compatible magnetic hoop can make an awkward bag easier to secure.
This step-by-step guide explains how to match your machine to your projects, decide whether a riser will help, and stitch a circle monogram on a finished tote. Along the way, you’ll learn why placement, stabilizer, and tracing matter just as much as hoop size.
Step 1: Match Your Machine to the Projects You Want to Make
Before comparing embroidery machines for beginners, make a short list of the things you actually want to personalize. Tote bags, adult shirts, baby onesies, and small lettering present different challenges, even when the embroidery designs themselves are similar in size.
For this project, the goal is a 3-inch circle monogram on a large canvas tote with a faux-leather center strip. The monogram fits within a 4×4 embroidery area, although the working setup uses a compatible 5×7 magnetic hoop.
That distinction is important: the design must fit the embroidery field, and the item must fit around the machine. A larger hoop does not automatically make a closed bag easier to load.
Compare the relevant machine options
| Machine | Relevant features | What to consider |
|---|---|---|
| Brother PE770 | Older embroidery-only flatbed model with a 5×7 embroidery field | Its monochrome screen requires careful checking of design selection and orientation. |
| Brother PE800 | Embroidery-only flatbed model with a 5×7 embroidery field and color screen | The same general tote-handling approach applies, using accessories listed for the model. |
| Brother SE1900 | Combination sewing and embroidery machine with a 5×7 embroidery field | Consider it when you want sewing capability as well as embroidery. |
| Brother NQ1600E | Larger flatbed embroidery machine with 5×7 and 6×10 hoop options | Provides more design space, faster stitching than the PE800, and jump-stitch cutting. |
| Brother Persona PRS100 | Single-needle free-arm embroidery machine | The narrow arm makes positioning closed items such as bags easier. |
Among these embroidery machines for beginners, the PE770 and PE800 provide a practical 5×7 flatbed reference point. The SE1900 adds sewing capability, while the larger NQ option addresses projects that need more embroidery space.
For additional context on these different machine types, the embroidery machine overview explains the flatbed, combination, free-arm, and multi-needle setups.
Use a project-first decision checklist
- Small monograms: Check the finished design dimensions before deciding how much hoop space you need.
- Sewing and embroidery: Consider whether a combination machine serves both interests.
- Larger designs: Compare embroidery fields rather than assuming an accessory will increase the machine’s stitching limits.
- Finished bags and garments: Think about loading clearance, not only the size of the design.
The most useful comparison of embroidery machines for beginners is the one that connects features to your next project.
Step 2: Decide Whether an Embroidery Riser Will Help
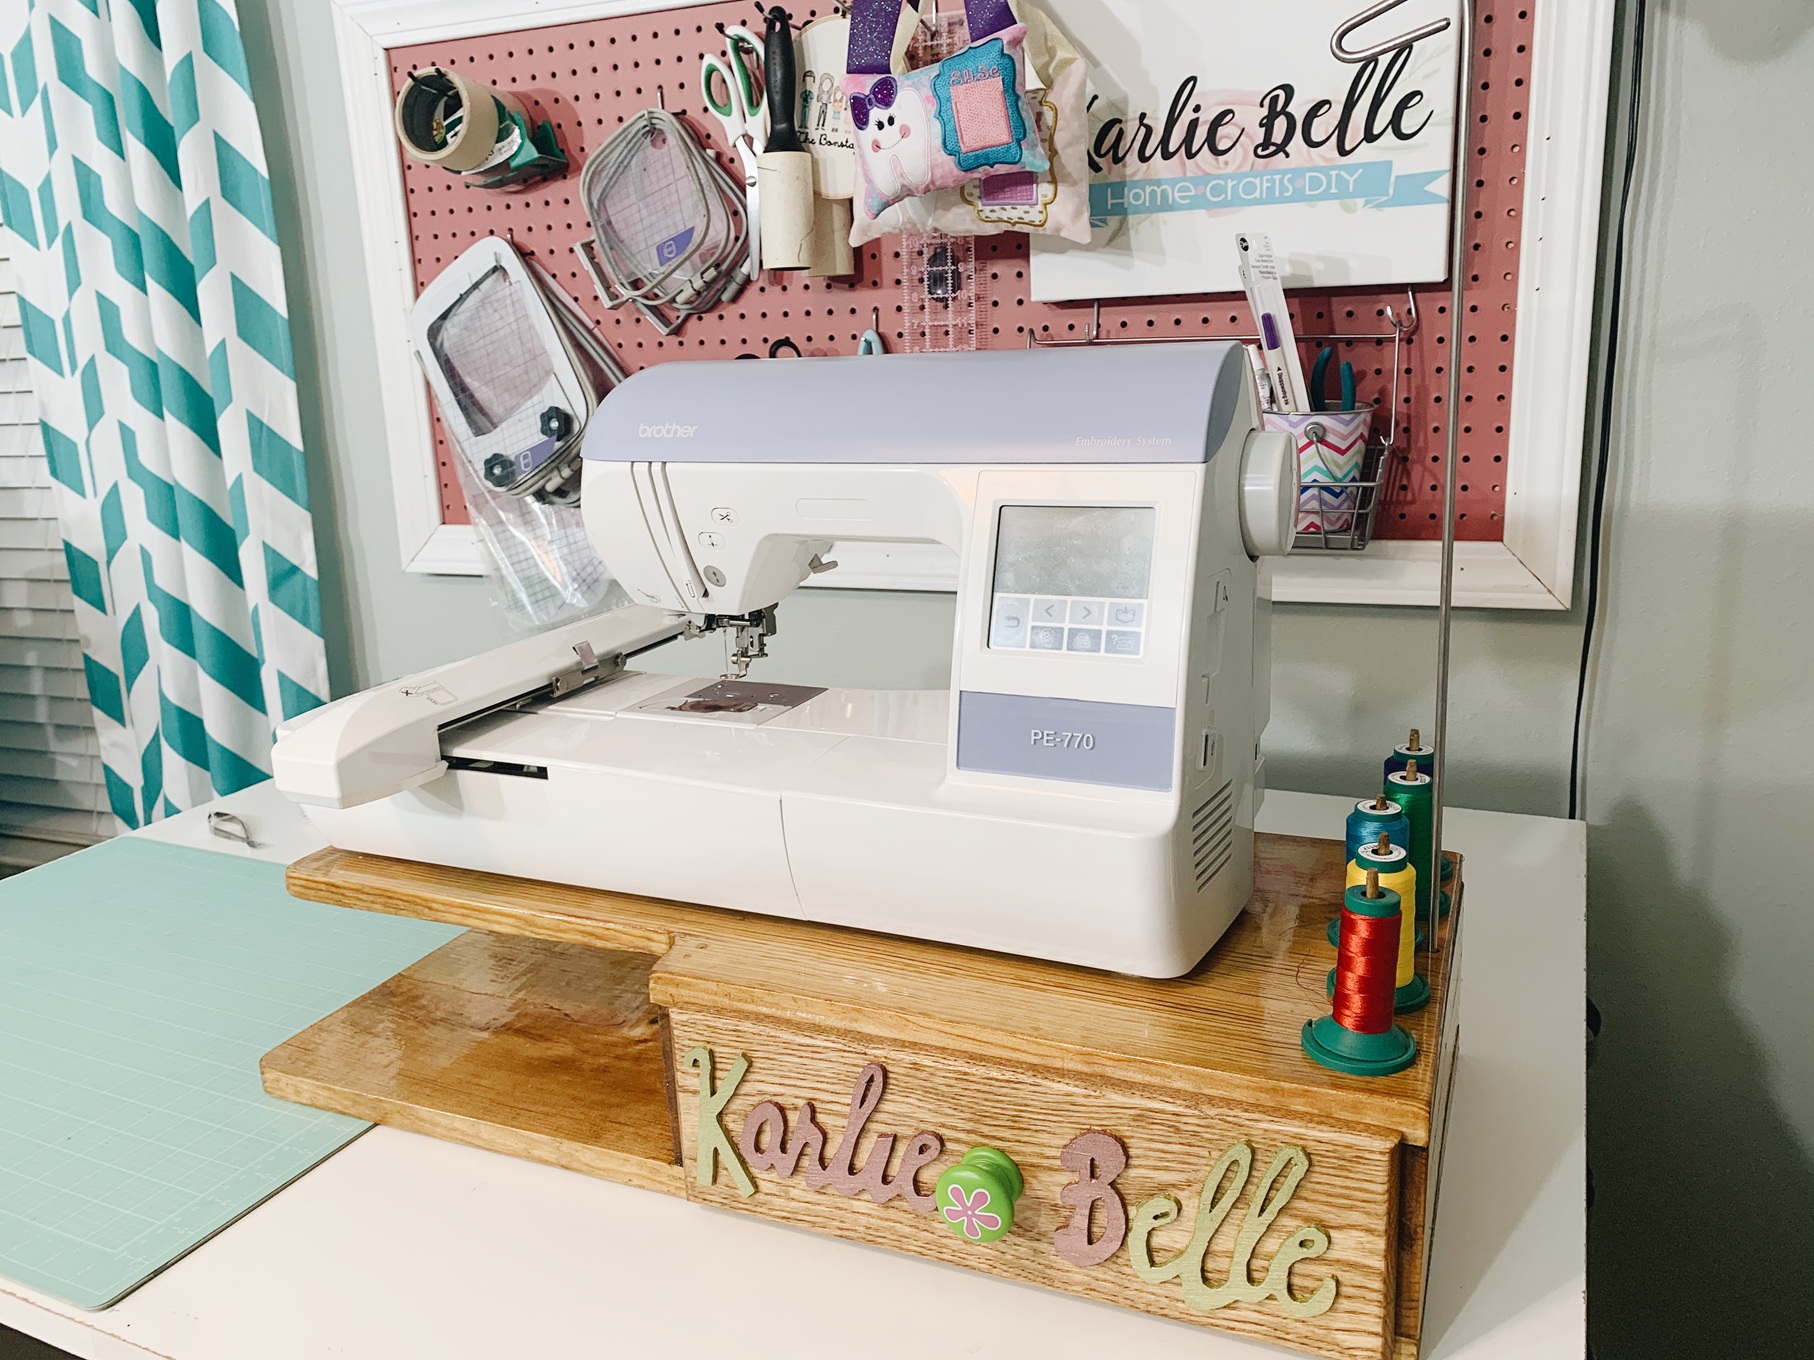
An embroidery riser is a platform that raises a flatbed machine above the table. The riser used in this setup creates approximately 4 to 5 inches of clearance, allowing excess fabric to hang below the embroidery area.
Without that space, a finished tote can leave you managing a bundle of material beside the hoop. Raising the machine gives a sufficiently large bag somewhere to go as the hoop travels.
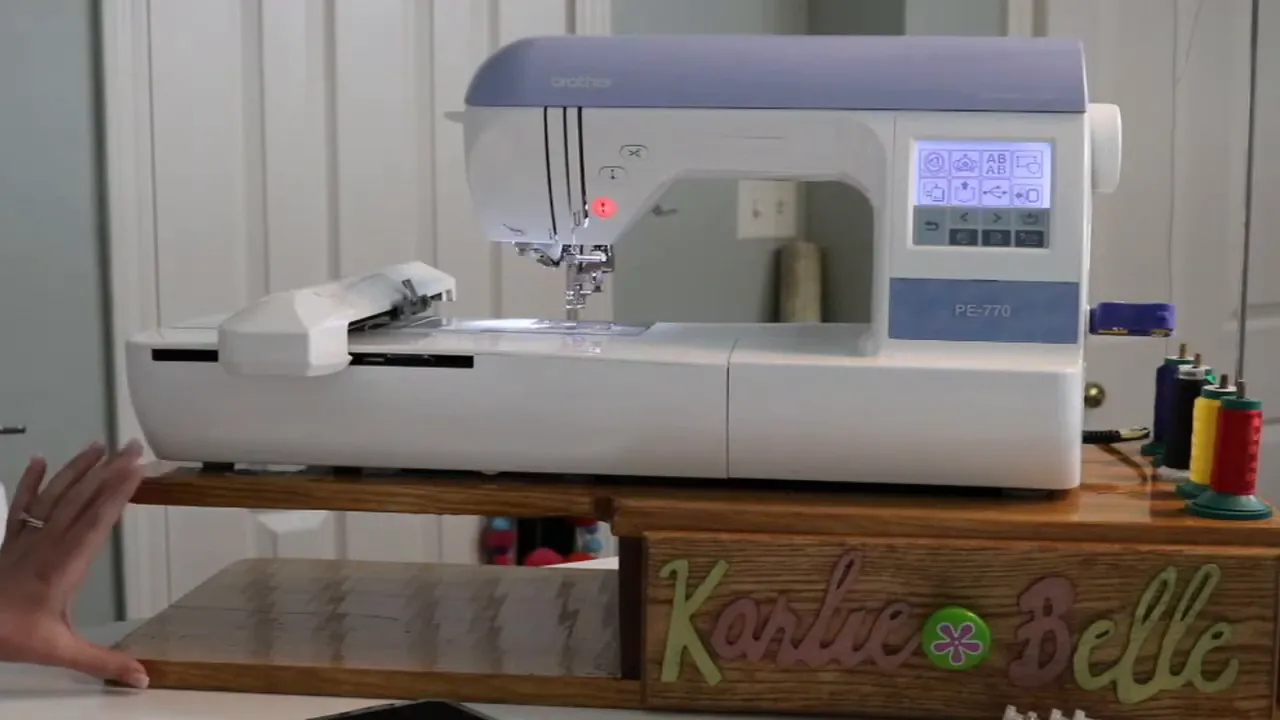
For flatbed embroidery machines for beginners, a riser can be useful when the project opening is large enough to go around the embroidery unit. It helps with fabric handling, not design size.
A riser is not a true free-arm conversion
A free-arm embroidery machine has a narrow arm containing the bobbin area that can extend inside a bag or garment. A riser does not change the construction of a flatbed machine or relocate its bobbin.
Instead, it provides a way to route suitable items around the existing embroidery unit. The machine still needs enough room to move the hoop through the complete design.
Check which items benefit
- Large tote bags: Good candidates when their openings and bodies fit around the embroidery unit.
- Some adult shirts: May work well, depending on size, neckline, stretch, and design placement.
- Baby onesies and toddler shirts: Do not expect this riser method to solve their small-opening challenges.
- Items on larger flatbed machines: Need particular attention because the larger embroidery unit can be harder to fit inside an opening.
An adult scoop-neck shirt, for example, may slip around the unit more easily than a smaller garment with a narrow neck. A shirt does not always need its neckline to pass around the entire unit, but it must remain free to move without catching.
Step 3: Verify Accessory Compatibility and Set Up Your Workspace
Accessories for embroidery machines for beginners are not interchangeable simply because they have the same advertised hoop size. Check the exact machine model on both the riser and hoop listings.
The smaller riser discussed here was made for the Brother PE770, PE800, and SE1900. A separate larger version was offered for the Brother NQ1600E, Baby Lock Flourish II, and Brother NQ3600D. Confirm current fit and availability before ordering.
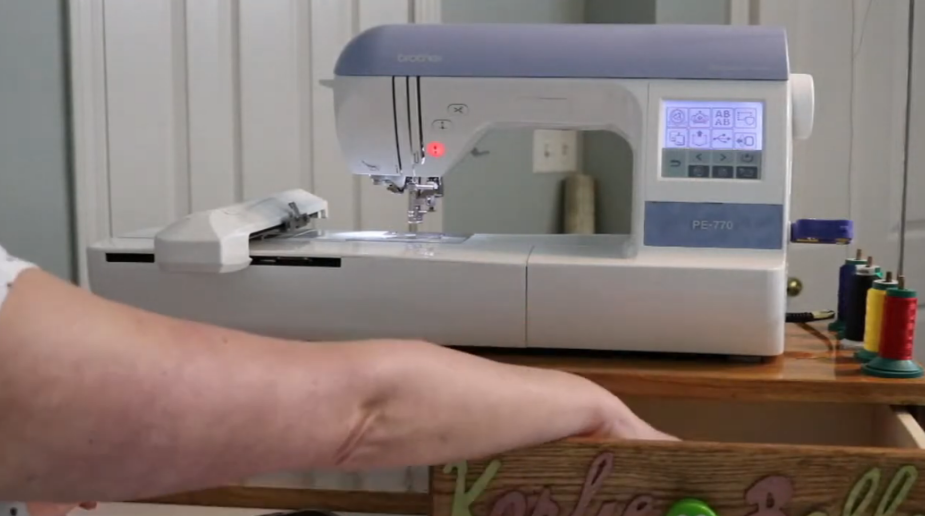
The riser design also includes a thread guide and five spool-holding positions. Optional storage beneath the machine can hold smaller hoops, although the large 5×12 multi-position hoop does not fit the demonstrated drawer.
Prepare for unobstructed movement
- Set the riser on a stable work surface with its base fully supported.
- Position the machine according to the riser maker’s instructions.
- Clear the embroidery carriage’s working area.
- Leave the space needed beneath the embroidery unit free of stored items.
- Keep bag handles, cords, and nearby supplies out of the moving hoop’s path.
Storage is convenient, but clearance is the reason for using the riser. Do not fill the space your bag needs to occupy.
When evaluating accessories for embroidery machines for beginners, start with fit and function. Drawer options and decorative finishes come after confirming that the riser supports your machine and suits your projects.
| Find a Riser for Your Flatbed Embroidery Machine Check Carol’s embroidery riser options and confirm the version listed for your machine model. Browse Embroidery Risers |
Step 4: Gather Supplies and Inspect Your Tote Bag
This project personalizes a finished bag rather than constructing one in the hoop. Choose a tote with enough access to load it around the embroidery unit and an embroidery area that can sit flat.
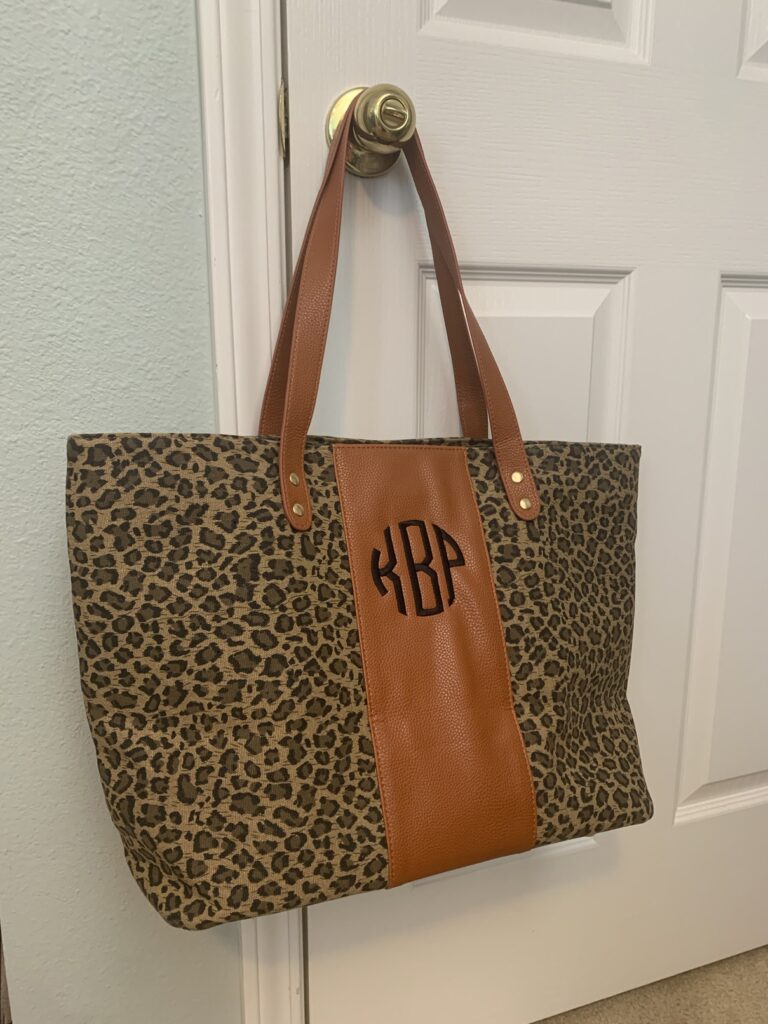
The example is a large, lined canvas tote measuring roughly 19 inches wide, 12 inches tall, and 7 inches deep. It has faux-leather handles and a center strip, a top zipper, and an interior zippered pocket.
Supplies needed
- Embroidery Riser (only available for PE770/ PE800/ SE1900 along with NQ1600E/ Baby Lock Flourish II/ NQ3600D right now)
- Leopard Tote Bag
- Monogram Font
- Embrilliance Essentials
- Peel n Stick Tear Away Stabilizer or you can try Regular Tear Away with Spray Adhesive
- Disappearing Ink Fabric Marker
- Ruler
- 75/11 Needle
- Embroidery Thread
- Pre-wound Bobbin for PE800
- Thread Stand
The reference setup uses black thread and a 75/11 ballpoint needle. Treat that as the combination used for this particular bag, not a universal needle recommendation for every canvas, vinyl, or leather project.
Look inside before marking the outside
A pretty front panel can hide a pocket, thick seam, or other obstruction. Open the tote and feel behind the proposed monogram location.
- Is an interior pocket directly behind the design?
- Does a seam cross the stitching area?
- Can the opposite side of the bag stay away from the needle?
- Will the handles and zipper remain clear during hoop movement?
- Does the decorative strip lie reasonably flat?
On the example bag, the interior pocket is on the opposite side from the monogram. An internal seam sits above the design area, so placement is adjusted to keep the stitching below it.
This inspection matters on all embroidery machines for beginners. A riser makes handling easier, but it cannot prevent stitching through an unnoticed pocket.
Step 5: Prepare a Monogram That Fits the Available Space
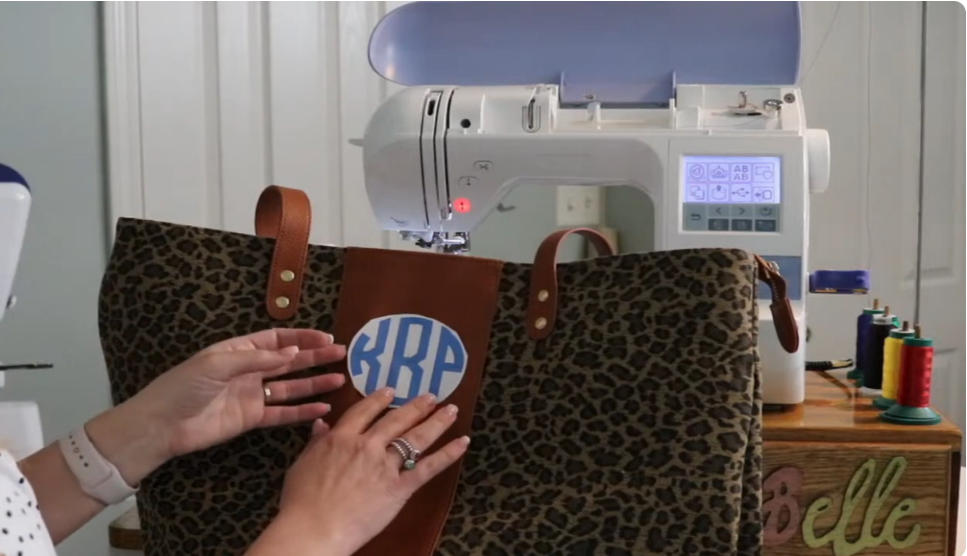
A small circle monogram is a manageable way to personalize a tote. Here, a 3-inch design fits neatly on the brown center strip, and black thread provides a coordinated contrast with the leopard-print canvas.
The font used is the Natural Circle Monogram from Creative Appliques. Its BX version allows the lettering to be entered in Embrilliance rather than arranging each letter as a separate file.
For embroidery machines for beginners, a prepared monogram keeps the stitching straightforward while giving you useful practice with layout and positioning.
Print a true-size placement template
- Create the monogram in your embroidery software.
- Confirm its finished dimensions.
- Print it at actual size with its center crosshairs.
- Trim the surrounding paper enough to see the bag beneath it.
- Position the template on the tote and check the proportions.
A full-size printout helps answer two separate questions: Does the design look right on the bag, and does it fit the intended panel? A small image on a machine screen cannot show that relationship as clearly.
Measure instead of relying entirely on appearance. A vertical strip makes an off-center monogram particularly noticeable because the unequal side margins frame the error.
The reference strip is approximately 4½ inches wide. A roughly 3-inch-wide monogram leaves about ¾ inch on either side when centered. Use your own bag and design measurements rather than copying that placement automatically.
Step 6: Choose a Hooping Method Before Attaching the Bag
A finished tote can fit around the embroidery unit yet still block access to the hoop brackets. That is a separate problem from needing clearance underneath the machine.
The solution is to mount the prepared hoop first, then position the tote on it. This is a floating method: the stabilizer is secured to the hoop, and the bag is attached to that supported surface.
Why a magnetic hoop helps
The magnetic hoop used here has a flat metal frame and six separate magnets. Sticky stabilizer supports the embroidery area, while the magnets provide additional holding force around it.
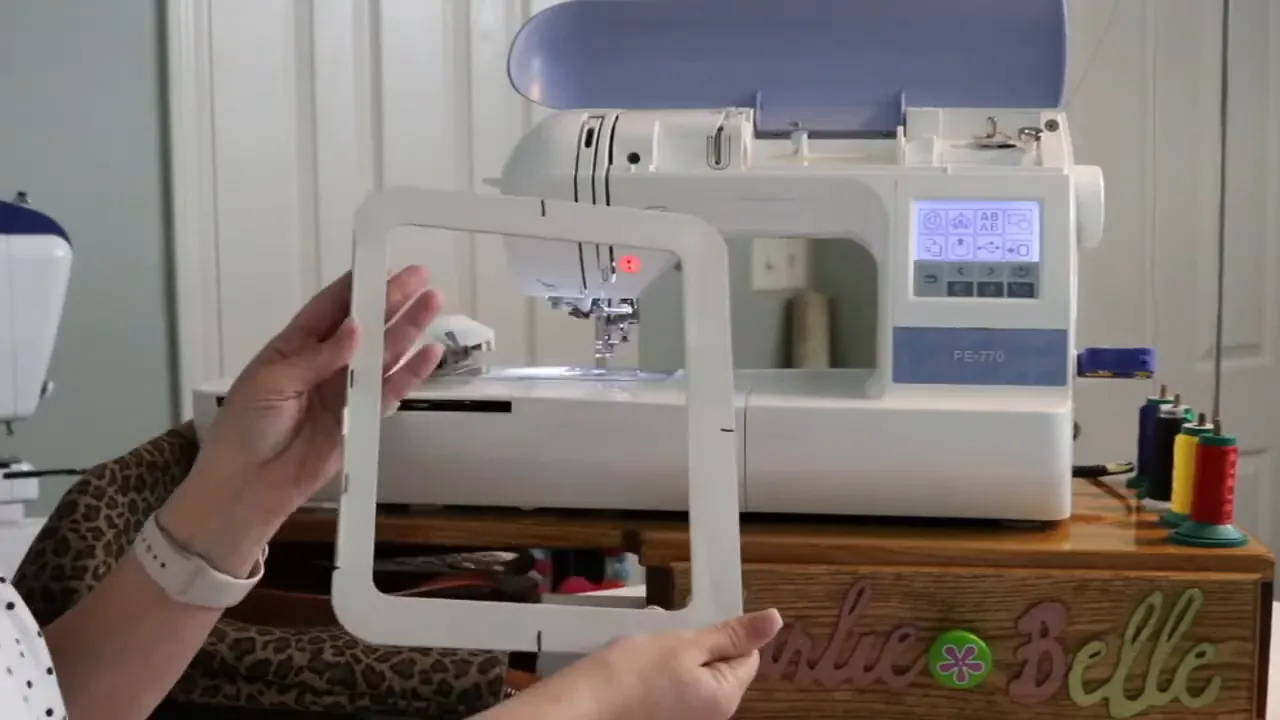
There are different magnetic hoop styles for embroidery machines for beginners. This separate-magnet flat frame is not the same as a two-piece Mighty Hoop used on a free-arm setup.
Use the magnetic hoops for flatbed machines guide to compare model-specific options. Matching bracket style is essential.
Can a regular hoop work?
A regular compatible hoop is another possible approach. Hoop sticky tear-away, mount the hoop, and then float the tote onto the exposed adhesive.
However, that arrangement lacks the extra support of the magnets. Depending on the bag and available access, clips or corner pins may help secure it. Keep any securing tools outside the design area and clear of moving machine parts.
Do not assume adhesive alone will resist a bag that rubs against the table or catches around the machine. The item must move freely, regardless of the hooping method.
Step 7: Prepare the Stabilizer and Mark the Design Center
For this structured tote, the working method uses sticky tear-away stabilizer. It spans the magnetic frame and provides an adhesive surface for floating the bag.
Stabilizer choices for embroidery machines for beginners should follow the material and project. Do not carry this tote’s tear-away choice directly over to a thin knit shirt.
Prepare the magnetic frame
- Remove the placement grid from the hoop.
- Turn the frame over.
- Cut stabilizer large enough to span the opening and adhere around the frame.
- Remove the backing paper.
- Attach it to the underside so the adhesive is exposed through the opening when the frame is upright.
- Press it firmly around the frame, keeping the spanning surface smooth and taut.
- Return the frame upright and use the grid to mark the center and alignment axes.
The stabilizer should not sag across the opening. A loose surface gives the embroidery area more opportunity to move.
Mark the tote
Use the paper template, ruler, and hoop grid to transfer a center crosshair to the bag. Include enough of the horizontal and vertical axes to judge whether the strip is straight.
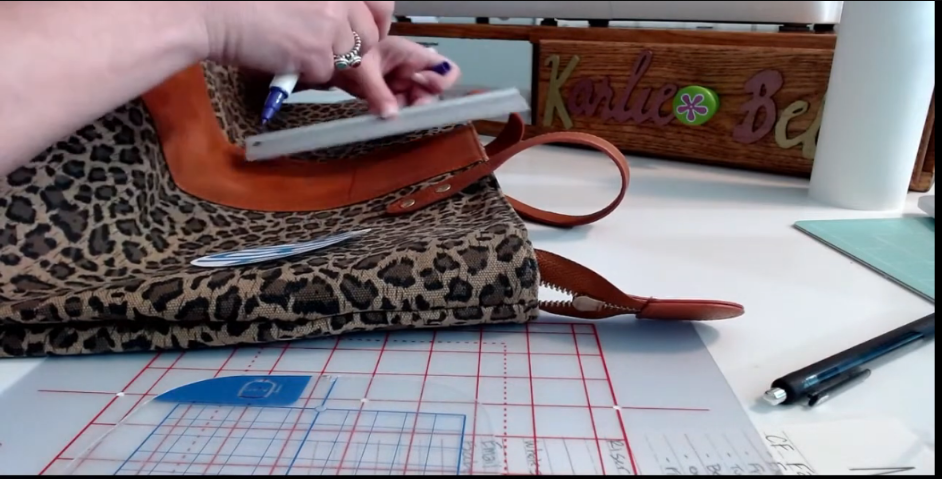
Disappearing ink can fade while you are preparing the rest of the setup. On the example’s faux leather, it also smudges easily. Work carefully and confirm that the marks remain visible when you need them.
For the adult knit-shirt variation, medium-weight cut-away was the proposed support for the thin, dark shirt. The clearance technique may be similar, but its stabilizing requirements are different.
Step 8: Mount the Hoop and Confirm Design Orientation
Attach the stabilizer-covered hoop before sliding the tote around the embroidery unit. Check that the brackets are fully engaged.
On a bracket-style system, a gentle check at the front corner can help reveal a hoop that has not snapped into place. Slight hoop movement is different from the bracket releasing; the hoop should not detach during that check.
Load the monogram from the USB drive and confirm the selected file. A descriptive name such as “Bag Monogram” makes identification easier when several designs are stored together.
Check rotation rather than assuming it is correct
The way you load the bag determines the required orientation. In this setup, the monogram needs a 90-degree clockwise rotation to finish upright on the tote.
That is not a setting to copy blindly. Imagine the bag removed from the machine and held normally: will the letters read correctly?
On the PE770, use the layout screen to verify orientation rather than relying only on the initial preview. The PE800’s color screen presents the design more clearly, but it still needs a deliberate orientation check.
Screen convenience is useful when comparing embroidery machines for beginners. It does not replace checking the loaded design against the actual position of your item.
Step 9: Float the Tote and Secure It Without Shifting
Slide the open tote around the embroidery unit so that the marked front panel rests over the prepared hoop. Let the excess bag material hang into the clearance created by the riser.
Align the tote’s crosshairs with those marked on the stabilizer. Check both center position and straightness before pressing the panel onto the adhesive.
- Align the center marks.
- Check that the decorative strip follows the intended hoop axis.
- Smooth the embroidery area evenly.
- Press the panel onto the exposed sticky stabilizer.
- Add magnets around the frame while checking that the panel does not slide.
- Inspect underneath and around the hoop for trapped fabric.
Handle the magnets carefully because they can pinch fingers. Keep them outside the stitching boundary and make sure they will not interfere with the presser foot or needle.
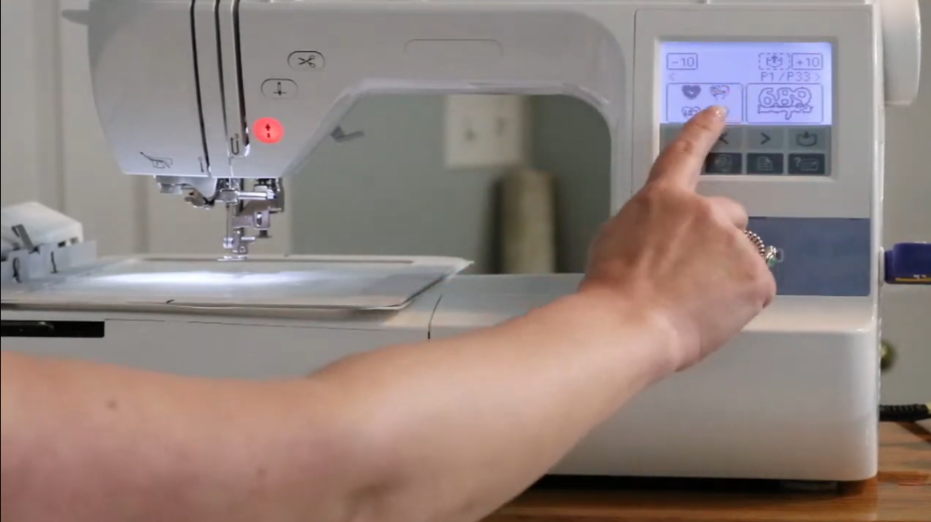
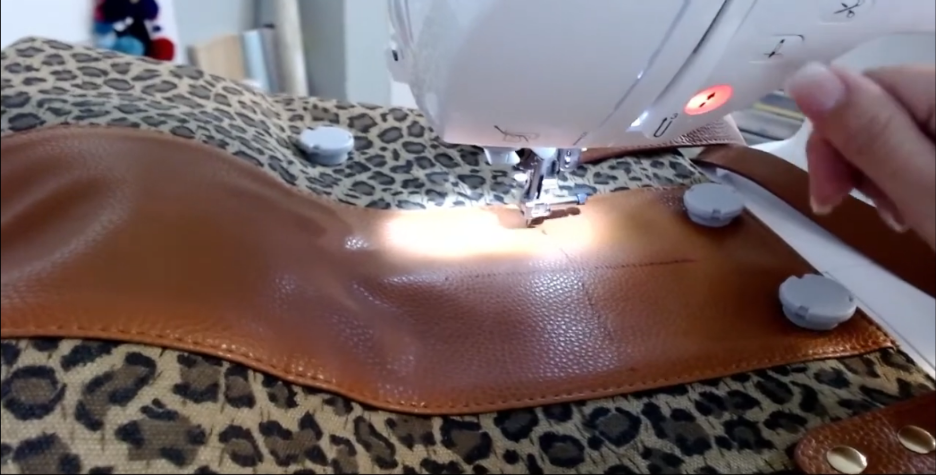
The faux-leather strip on the example bag is not perfectly taut against the canvas. Securing the surrounding bag does not automatically flatten that decorative layer, so inspect it for bubbles before starting.
With embroidery machines for beginners, this is a good point to slow down. A few extra minutes arranging the bag are easier than correcting embroidery after the fabric shifts.
Step 10: Trace the Entire Design Before Stitching
Tracing is the final check of both placement and movement. It moves the hoop around the design’s boundary so you can confirm where the embroidery will fall.
Do not treat a hoop recommendation on the screen as proof that the attached hoop is safe. The PE770 does not automatically identify which hoop has been mounted.
Check the center and outer limits
Use the trace function to inspect the top, bottom, left, and right limits, or run its automatic boundary trace. Confirm that the entire monogram stays on the intended strip.
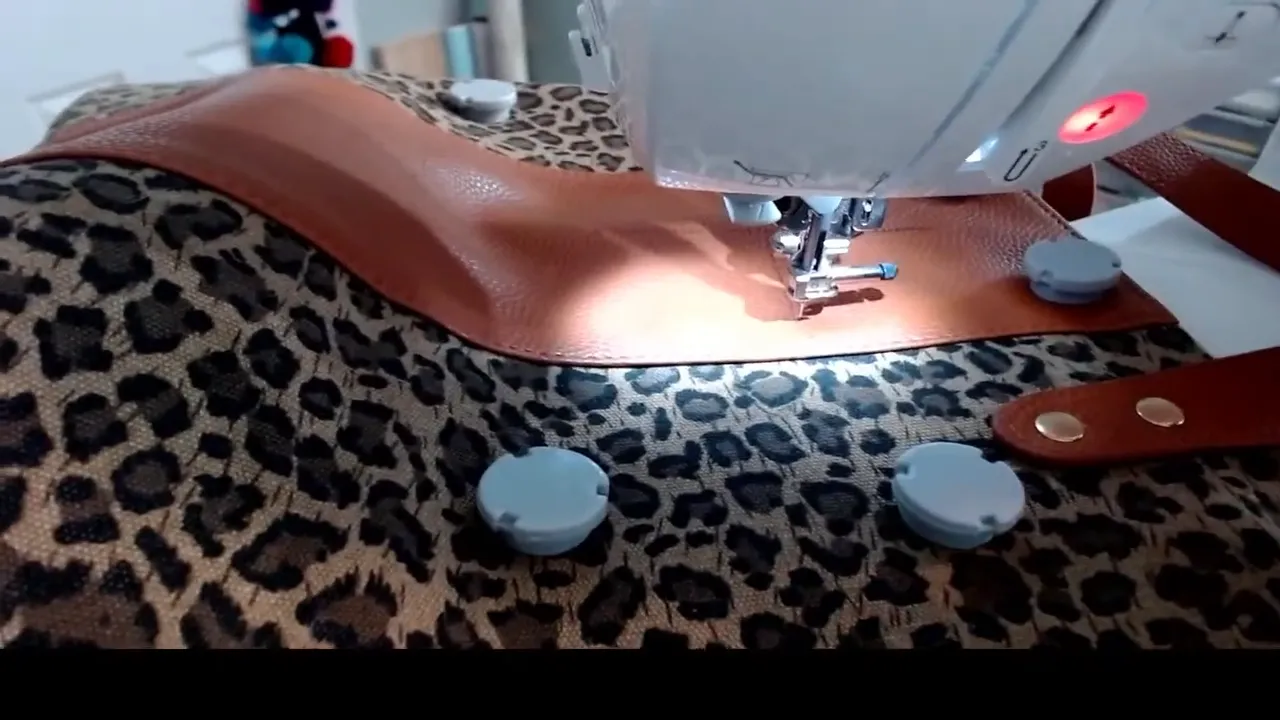
- The design remains inside the hoop’s safe stitching area.
- The needle and foot clear the magnets and any other securing tools.
- The monogram stays below the internal seam.
- The bag moves without catching on the riser or table.
- Handles and the opposite bag wall remain out of the stitching area.
- The decorative panel stays flat throughout the movement.
If anything catches, stop and rearrange the bag before tracing again. Strong adhesive and magnets cannot compensate for restricted travel.
Some placement checks involve lowering the needle to inspect a position. On faux leather, that can leave a puncture. Avoid unnecessary test holes outside the finished stitching.
For embroidery machines for beginners, tracing is one of the most valuable habits to develop. Repeat it after changing placement or moving the design.
Step 11: Stitch the Monogram and Finish the Bag
Thread the machine through its prescribed thread path, using the riser’s thread guide if appropriate. Confirm the bobbin is ready, lower the presser foot, and begin stitching.
If a loose starting tail remains on the surface, pause and trim it before it becomes trapped beneath later stitches. Resume only after scissors and fingers are clear.
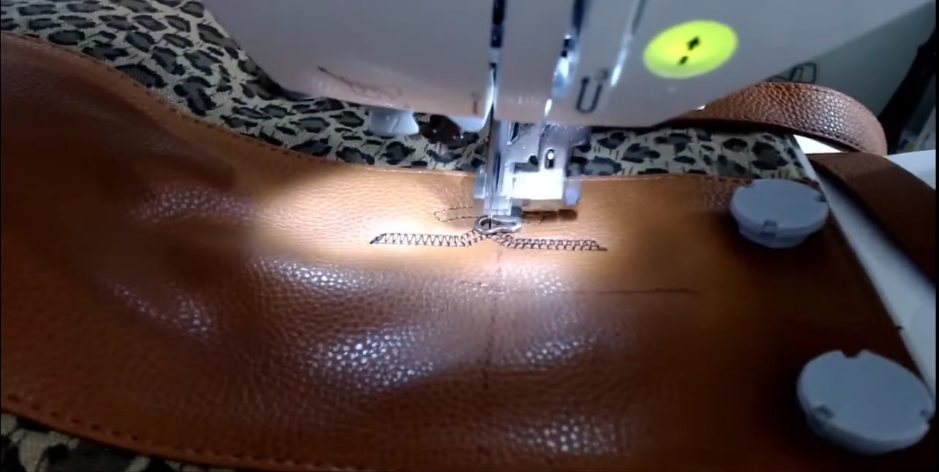
The example monogram has a machine estimate of approximately 16 minutes. That is stitching time, not total project time. Printing, marking, securing, tracing, and finishing all add to the process.
Monitor fabric movement
Stay nearby and check that the tote continues moving with the hoop. If it catches or a loose layer approaches the needle, pause the machine rather than pulling the bag while it stitches.
The PE770 does not automatically trim jump stitches within this single-color design. Those connecting threads are removed after stitching.
Remove the tote carefully
- Wait until the machine has finished and stopped.
- Remove the magnets.
- Raise the presser foot.
- Separate the bag from the tear-away stabilizer carefully.
- Slide the tote off the embroidery unit.
- Trim the remaining jump stitches with small scissors.
- Remove remaining placement marks as appropriate for the material.
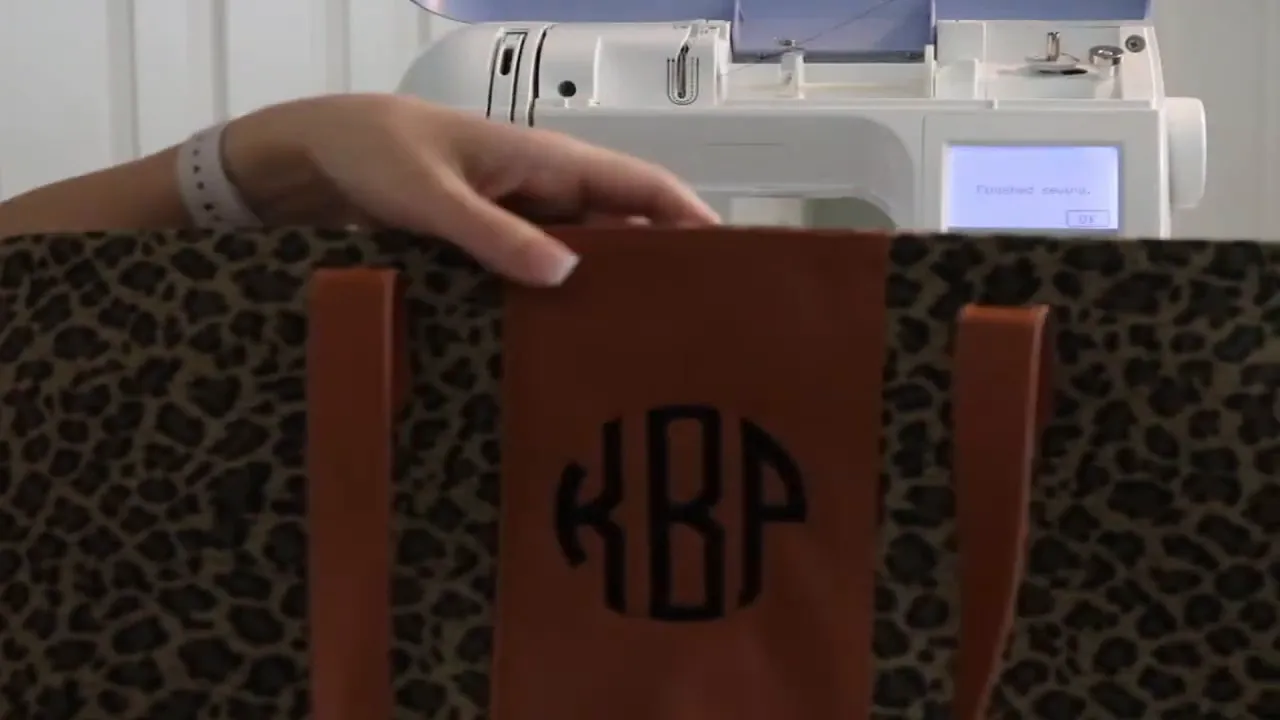
Inspect the finished embroidery for straightness, puckering, and untrimmed connecting threads. The result should sit comfortably within the strip without crowding its edges.
Step 12: Troubleshoot the Setup Before Your Next Project
Successful projects on embroidery machines for beginners depend on identifying the source of a problem. Clearance, attachment, stabilization, and placement each need their own check.
The bag fits, but the hoop brackets are inaccessible
Prepare and attach the hoop first, then float the bag onto it. That reverses the loading order without changing the design.
The hoop releases from the machine
Check bracket engagement. For a regular hoop, also confirm that the inner and outer rings remain securely tightened together. These are two different connections.
The bag shifts during travel
Look for friction or catching before adding more holding force. Reposition the handles and excess fabric, then inspect the adhesive contact and magnets.
The monogram looks crooked
Recheck both alignment axes. Matching only the center point does not guarantee that the decorative panel is straight.
The item will not fit around the embroidery unit
Do not force it. A riser is useful only when the item has enough room. Consider a different handling method, a more accessible blank, or a suitable free-arm setup.
For other tote approaches, including projects that need different access or larger designs, use the complete guide to embroidering a tote bag.
The takeaway: choose embroidery machines for beginners around the work you want to do, then build a setup that lets the item move freely. For this tote, the key combination is a compatible riser, a securely mounted hoop, appropriate stabilizer, accurate crosshairs, and a complete trace before stitching.
Answer Common Beginner Embroidery Questions
Which embroidery machines for beginners work for this tote method?
The reference method uses the Brother PE770 and applies to the PE800 and SE1900 with compatible accessories. Other machines require their own fit checks. The tote must fit around the embroidery unit and move freely through the complete design.
Do I need a 5×7 hoop for a 3-inch monogram?
A 3-inch monogram can fit within a 4×4 embroidery area. This setup uses a 5×7 magnetic hoop for handling and securing the bag. Design fit and convenient hooping are separate considerations.
Does a riser increase the embroidery field?
No. It raises the machine to create clearance for excess material. It does not change the machine’s maximum stitching area or make an oversized design fit.
Is a magnetic hoop required to monogram a tote?
No. A regular compatible hoop holding sticky stabilizer is another possible floating method. However, the magnets provide additional support in this setup. Whatever method you use, the bag must remain secure without catching during travel.
Will a riser make baby onesies easier to embroider?
Not with this routing method. Small onesies and toddler shirts do not offer the same clearance as suitable adult garments or large totes. Raising a flatbed machine does not turn it into a narrow free-arm machine.
Should I use tear-away stabilizer for every beginner project?
No. Sticky tear-away works in this particular structured-tote setup. Thin knit shirts need a different support choice, such as the cut-away considered for the adult-shirt example. Match the stabilizer to the item rather than the machine alone.
Can I skip tracing if the design fits on the screen?
No. Tracing checks the actual mounted setup, including the hoop, magnets, panel boundaries, and bag movement. A correctly sized design can still be poorly positioned or obstructed by the item around it.
PIN IT!
Thanks for stopping by!
🧵 Enjoyed This Post? Come Stitch With Me!
If you enjoyed this post and want to learn more, I would love for you to join our wonderful crafting community! Whether you’re brand new to machine embroidery or ready to take your skills to the next level, I have courses, tutorials, and a supportive community to help you along the way.
✨ Explore My Online Courses
- 🪡 From Start to Stitch – Perfect for beginners! Learn the basics of machine embroidery, including stabilizers, hooping, appliqué, monogramming, and more.
- 💻 Embroidery Essentials – Learn how to use Embrilliance Essentials software to customize designs, work with lettering, and create beautiful embroidery projects.
- 🎨 Embroidery Enthusiast – Ready for more advanced software techniques? Learn stitch editing, knockdown stitches, precise positioning, multi-hooping, and more using Embrilliance Enthusiast.
❤️ Join My Sip & Stitch Squad VIP Membership!
Looking for even more inspiration, projects, and hands-on learning?
Inside my VIP membership, you’ll enjoy exclusive embroidery designs, monthly live Zoom classes, a library of past tutorials, and a wonderful community of fellow embroidery enthusiasts.
👉 Learn More & Join the VIP Squad
🎥 Let’s Stitch Together on YouTube!
Come join me on my YouTube channel for FREE machine embroidery tutorials, Sip & Stitch LIVE projects, helpful tips, and creative inspiration!
👉 Subscribe to My YouTube Channel
🧵 Join Our Facebook Community!
Have questions, need help, or just want to share what you’re working on? Come connect with fellow crafters in my Facebook group!
Thank you so much for stopping by! I hope this post inspired you to try something new, learn a new skill, and have fun creating.
Happy Stitching! 💕
Karlie Belle