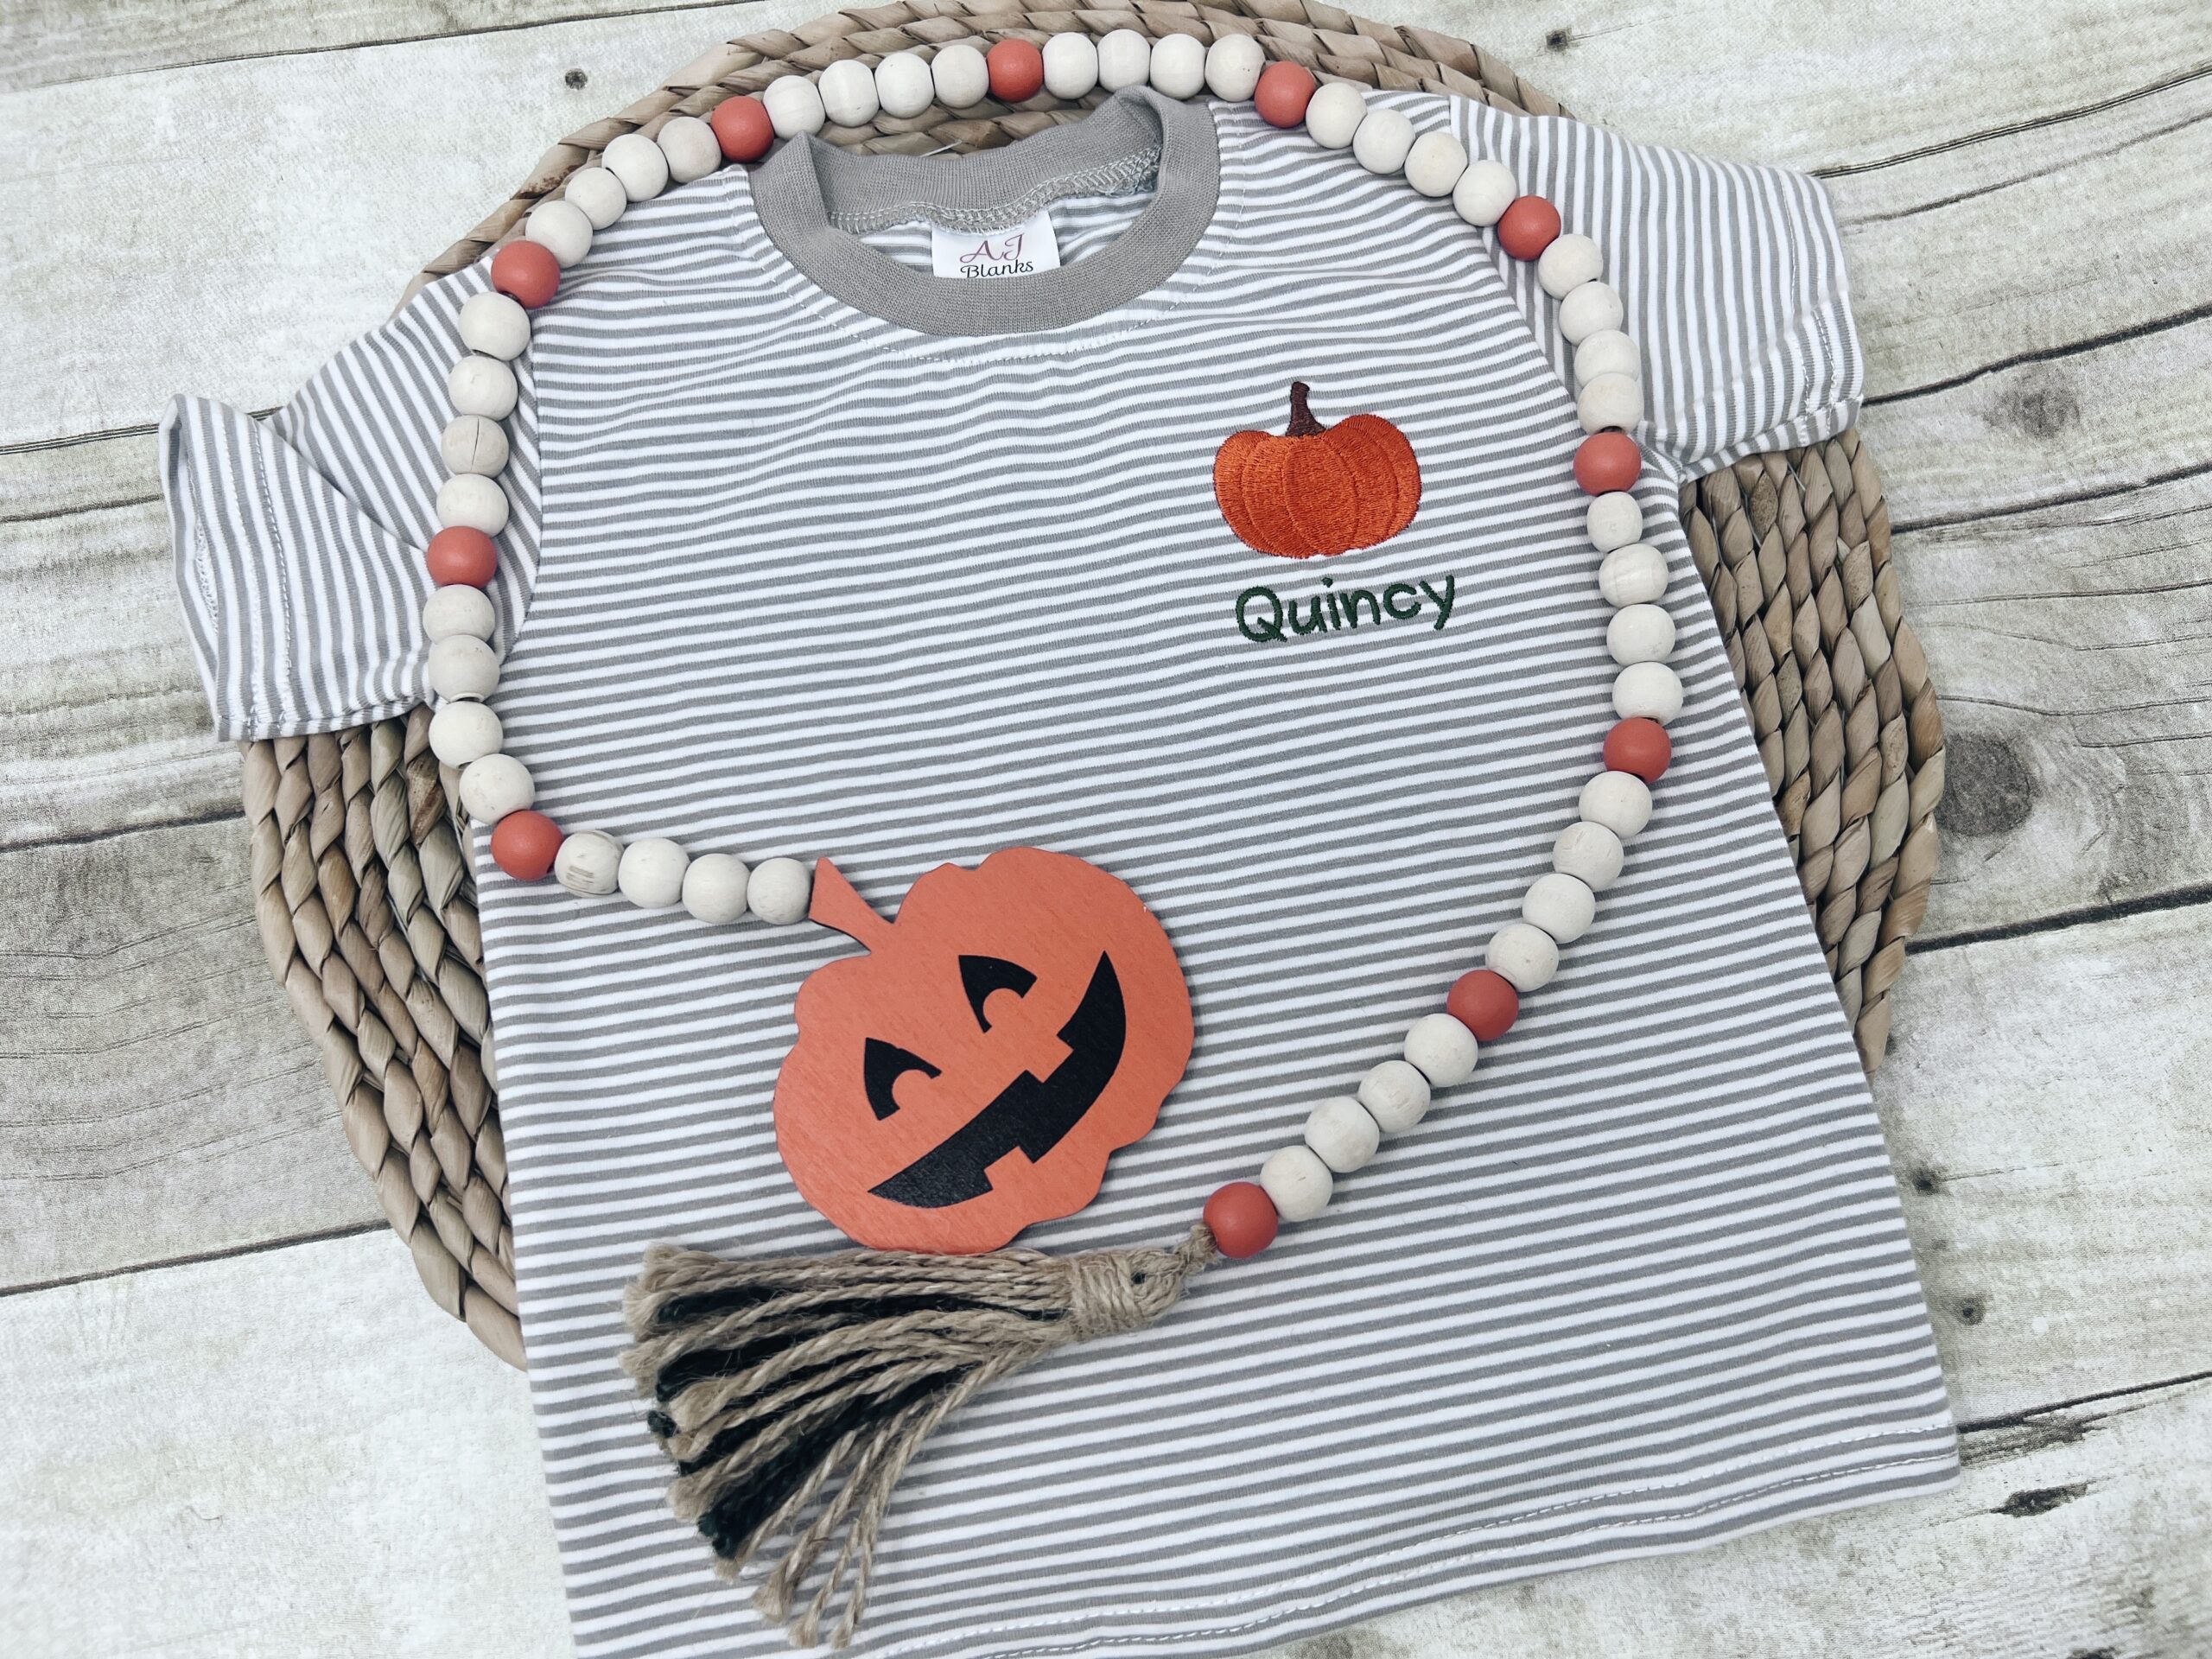
I love teaching small projects that build confidence, so today I will walk you through everything you need to know to embroider names with a machine and create cute toddler Halloween shirts. This is a step by step, practical guide that covers materials, stabilizers, measuring and placement, hooping with both Durkee EZ Frames and a standard 4×4 hoop, editing the design in Embrilliance Essentials, machine setup and threading, tracing and positioning, stitching, cleanup, and finishing with a soft fusible backing so the garment is comfortable for a child to wear.
Overview and project plan
I will be making small filled design – a candy corn – with a name underneath. The design fits inside a 4×4 hoop, so you can make this on any machine. I demonstrate floating on Durkee EZ Frames on a multi needle machine, and I also explain how to do it in a traditional 4×4 hoop. I will include tips for using poly mesh, tearaway stabilizers, water soluble topper, and how to finish with fusible soft interfacing. If you want to embroider names with a machine on a striped toddler shirt, this tutorial will help you do it accurately and safely.
Gathering Your Supplies
- AJ Blanks Striped Shirt
- Mini Halloween Embroidery Designs
- Embrilliance Essentials
- Brother PR680w 6 needle embroidery machine
- Use this link and fill out the form to request information on the PR680W or any other embroidery machine
- Durkee EZ Frames for PR680w Use coupon code “karliebelle” to save 10%
- Peel n Stick Tear Away
- No Show Poly Mesh stabilizer, choose Fusible No Show in the size you want. Use coupon code “karliebelle” to save 10%
- Fuse So Soft Use coupon code “karliebelle” to save 10%
- Water Soluble Topper
- Applique Scissors
- Organ 75/11 BP Needles Use coupon code “karliebelle” to save 10%
- Precision Tweezers
- Embroidery Thread Use coupon code “karliebelle” to save 10%
- Bobbins for Free Arm Machines Use coupon code “karliebelle” to save 10%
Step 1 – Choose your design and sizes
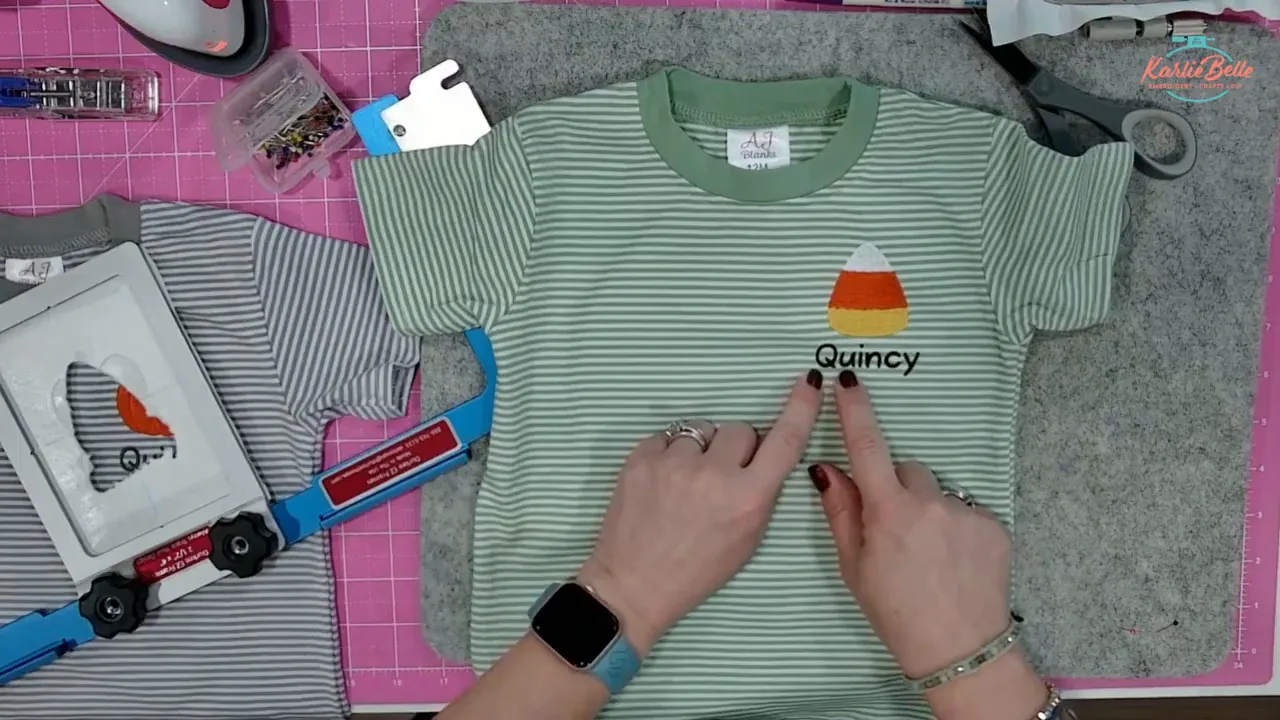
Pick a mini design pack that offers the motif in incremental sizes. I used a pack from Etsy https://www.etsy.com/listing/1782797506/set-mini-halloween-embroidery-set that included candy corn, pumpkin, witch hat and others. The file set I bought included the same motif in tenths of an inch, so I could pick the perfect size without resizing digitally. I chose the 2 inch candy corn for my toddler shirts. Having pre-sized versions saves time and preserves stitch quality.
Tip about designs
- Pick designs rated for small-shirt work and for the fabric type. A filled stitch design is fine on knit cotton as long as you stabilize correctly.
- For lettering, choose an embroidery font file installed as a BX or compatible format so Embrilliance can load it properly.
Step 2 – Plan placement and measure where to put the design
For toddler shirts, I use the edge of the collar as my vertical placement guide. The center of the embroidered area should line up with the side of the collar or the center front depending on where you want the design. For small designs like these, I eyeball horizontally but I make sure the vertical center aligns with the collar edge.
Detailed measuring steps
- Turn the shirt right side out and lay it flat on your table.
- Decide which side of the chest you want the design on. Typical placement is left chest area about 1.5 to 2 inches below the collar edge on a toddler shirt, but size varies. For very small shirts measure visually: place the tip of your finger where the collar seam ends and imagine the center of the design aligned with that point.
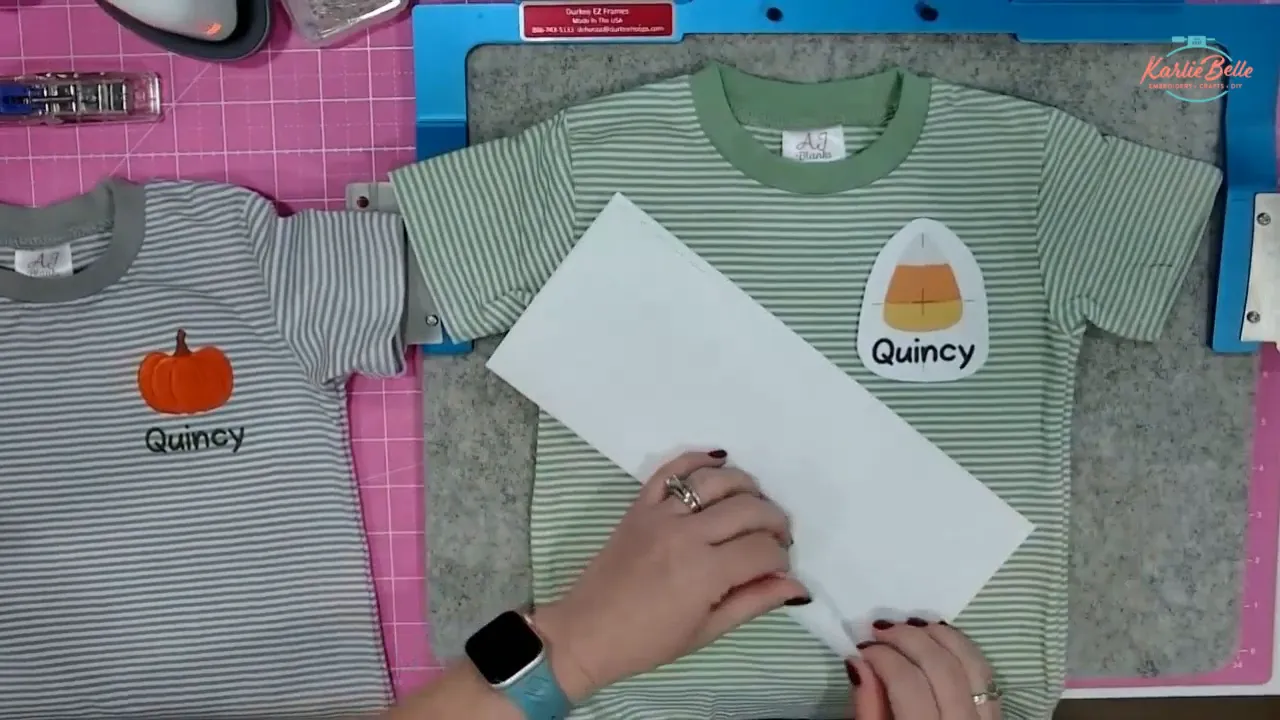
- If you want exact placement, measure from center neck seam and mark with a small removable fabric marker. For toddler shirts, you can also print the design at actual size on paper and cut it out. That printout will act as a true-to-size placement guide and will have crosshairs if you use Embrilliance printout.
Tip: The printout option is invaluable because the printed crosshairs are true to stitch size and allow you to position the design precisely before hooping or floating.
Step 3 – Prepare stabilizers: fusible poly mesh and sticky tearaway or cutaway
Stabilizer choice is one of the most important parts. Below I explain each stabilizer type and how I use them together to ensure stable stitching and a soft finish for children’s clothing.
No-show poly mesh (fusible)
No-show poly mesh is a cutaway-style stabilizer that is light and firm and does not show through the fabric. I use a fusible version on knit cottons to prevent shifting. The fusible side has a subtle sheen. Iron this to the inside of the shirt first. Cut a piece slightly larger than the area you will embroider. Place it adhesive side down onto the wrong side of the shirt and press to fuse. This acts as the primary stabilizer that stays in the garment after trimming.
Sticky tearaway stabilizer
Sticky tearaway is my second layer when I float. I use it on top of the poly mesh. The sticky layer holds the fabric smooth while the machine stitches and prevents hoop marking. It is especially useful with Durkee EZ Frames or when working on free arm multi needle machines. If you prefer not to use sticky stabilizer, use cutaway and clips with the Durkee frames and a temporary spray adhesive.
Cutaway stabilizer plus clips
If you do not want sticky stabilizer, place regular cutaway stabilizer under the Durkee frame and use small reusable clips to secure it to the frame edge. The clips hold the stabilizer taut and then you can use temporary spray adhesive on the stabilizer to attach the shirt piece. Rapsico Supa clips work well for this application. Add 2 to 4 clips per side depending on frame size.
Water soluble topper
On knits and tshirts I always use a water soluble topper. This prevents the satin stitch edges from looking jagged because thread sinks into the knit. Trim the topper after stitching. If you stitch on the face fabric directly, lay a piece of water soluble topper taped to the fabric or clipped so it does not interfere with stitches. Remove after stitching by peeling; a quick rinse will remove all residue if needed.
Fuse So soft interfacing for the back
After all stitching and tearing away stabilizer, cover the back with a soft fusible interfacing such as Fuse SoSoSoft. Cut it slightly larger than the remaining stabilizer and round the corners. Press from the right side with a pressing cloth or low heat. This soft backing prevents scratchy thread from irritating the child’s skin and extends the life of the embroidered area. If it lifts after washing, re-press with an iron or heat press.
Step 4 – How to hoop or float the shirt with Durkee EZ Frames
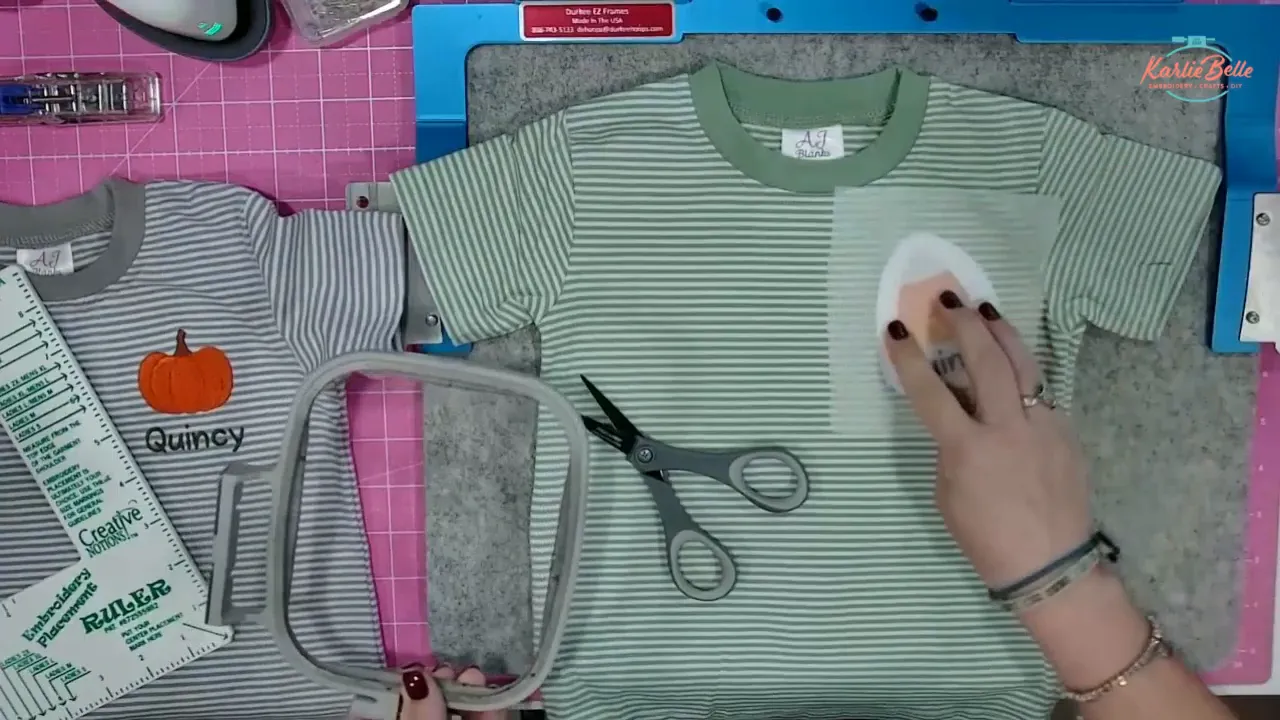
Floating means the shirt is not pinched inside the hoop. Instead, the stabilizer is attached to the frame and the shirt is smoothed over that backing. This prevents hoop marks and allows easier access for a small garment.
- Cut your sticky tearaway to the frame size and place the adhesive side against the back of the frame. Smooth it to be taut like a drum. If you have a smaller sticky patch that already has a hole from previous use, you can patch the worn spot with a scrap of sticky stabilizer placed over the hole. Press down firmly.
- Attach the Durkee frame adapter to the machine. The adapter ensures frames slide on the machine in only one correct direction, which reduces errors.
- With the fusible poly mesh already ironed on the inside, slide the shirt over the frame from whichever opening is easiest. For me, sliding from the bottom of the shirt is easiest. Make sure the printed placement guide or crosshair lines up with the desired spot on the shirt.
- Smooth the shirt over the frame. Make sure there is at least one finger width of clearance between the stitched area and the metal edge so the presser foot cannot hit the frame. Use gentle pressure to seat the shirt against the sticky stabilizer.
- Tighten the frame clamp, and double check placement. Leave your placement printout pinned to the shirt until you can confirm alignment on the machine screen in the next steps.
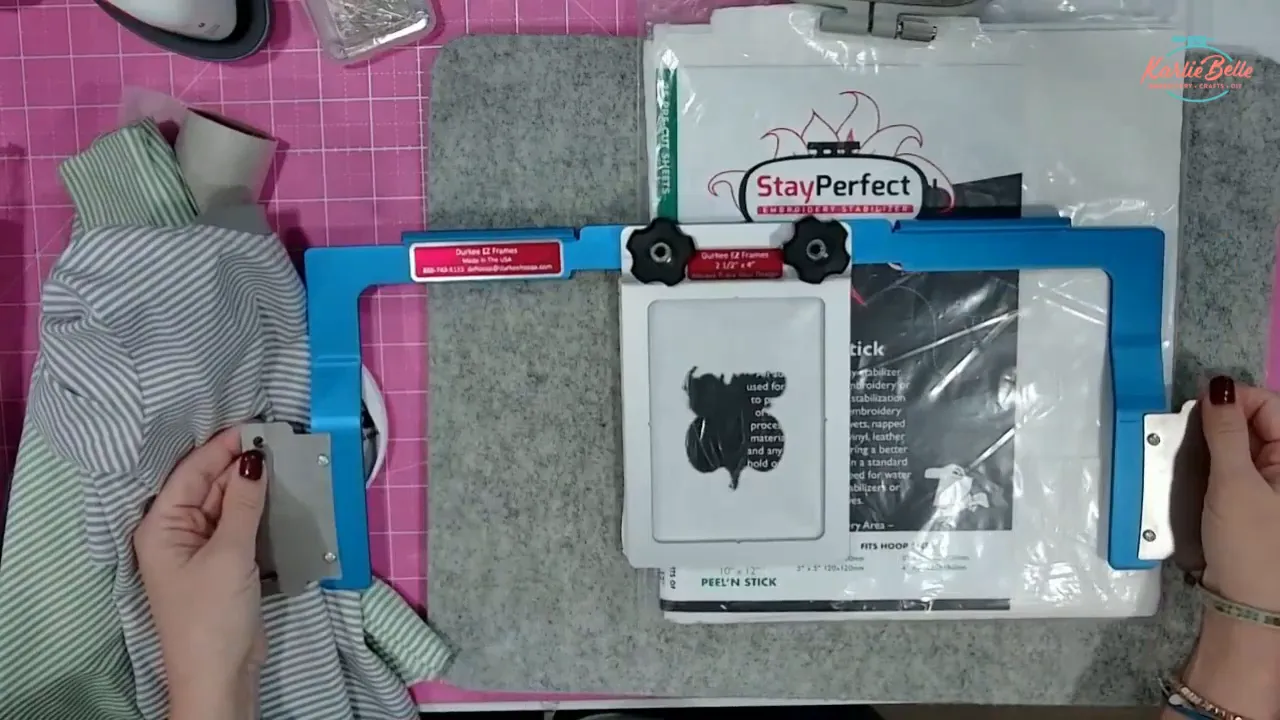
Tip: If you do not want to use sticky stabilizer, use cutaway under the frame and secure it with the Supa clips. Spray a little temporary adhesive onto the stabilizer and press the shirt to it. This prevents sticky residue and still floats the garment.
Step 5 – How to hoop a shirt in a traditional 4×4 hoop (flatbed machines)
If you only have a 4×4 hoop or flatbed machine, you can still do this project. You will either hoop the stabilizer and stick the shirt to it, or hoop both poly mesh and tearaway with the shirt sandwiched.
- Cut a piece of sticky stabilizer slightly larger than the hoop. Leave the protective paper on until the stabilizer is firmly hooped.
- Loosen the hoop, place the top ring and lay the paper-to-protective film side up, then tighten the hoop. Use a pin or scissors to score an X or small hole where you want to remove the film. Pull the film away carefully so the adhesive remains exposed.
- Turn your shirt inside out and position the fused poly mesh on the wrong side. Then align the shirt so the printed crosshair or marked placement aligns with the hoop crosshair. Press the shirt to the sticky stabilizer cautiously to avoid wrinkles.
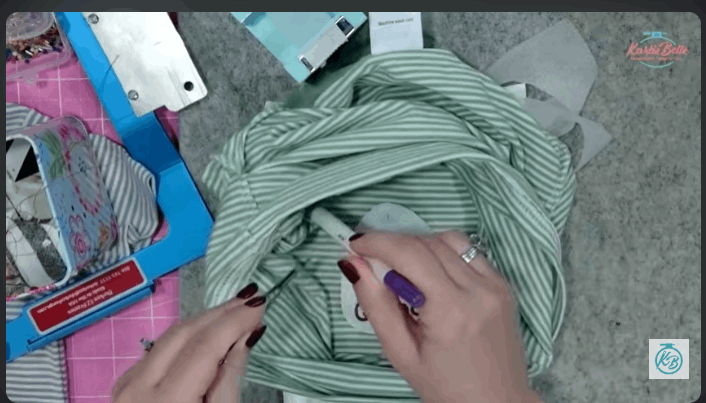
- Roll excess fabric away from the hoop. For very small shirts you may have to use chopsticks or a small dowel to keep fabric out of the stitching area. Or, hoop the shirt first with poly mesh fused and the outer stabilizer attached, then adjust as needed.
Tip: Babies and toddlers have small neck openings. When you insert the hooped area through the shirt neck, you might need to tape or clip the rolled fabric out of the way. Always keep an eye on the fabric during stitching to prevent it from being pulled into the needle path.
Step 6 – Set up the design in Embrilliance Essentials (detailed)
I organize designs locally and use Embrilliance Essentials to lay out the motif and add the name. This gives me accurate printouts and the exact stitch file ready to save as PES or the format your machine uses.
Organize and open your files
- Unzip any downloaded design pack. Move the PES files into your embroidery folder structure so you can find them. I keep folders by holiday and by motif.
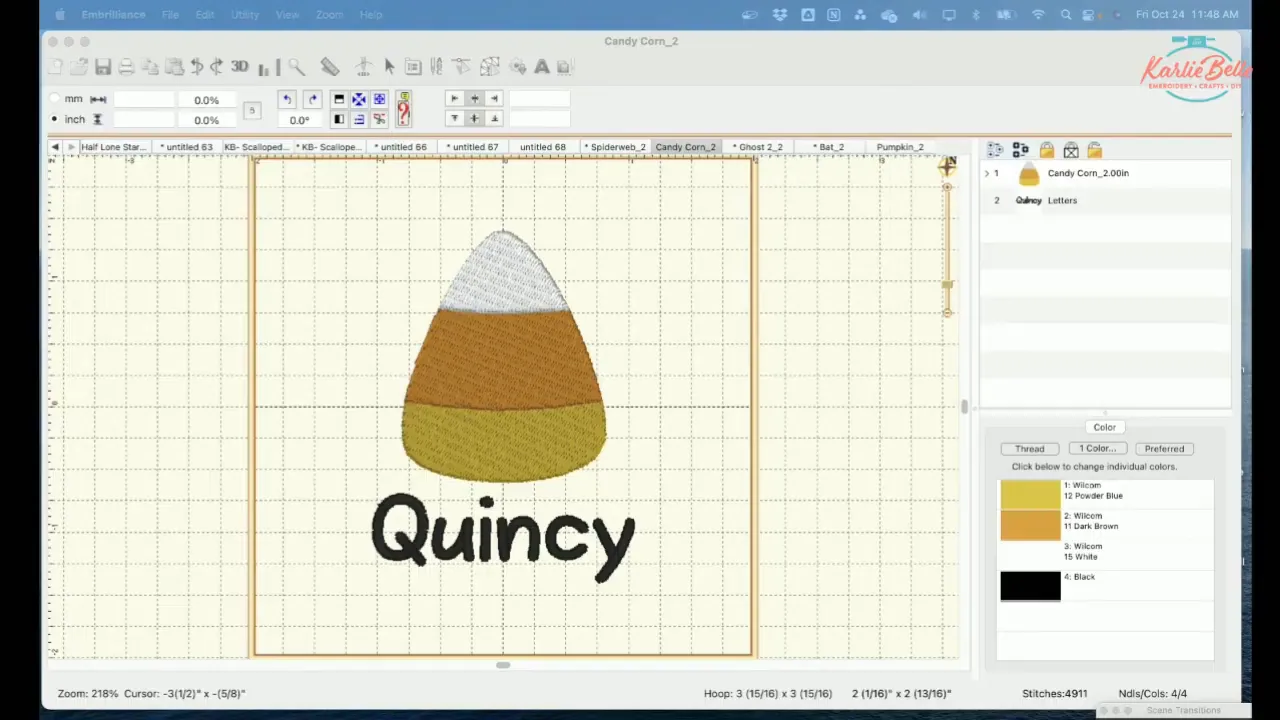
- Open Embrilliance Essentials. In Preferences choose the hoop size you plan to stitch to, for example 4×4. This will ensure the screen displays size correctly and printouts are true to size.
- Double click or drag your desired PES file into the Embrilliance workspace. If the pack contains many sizes, choose the size that visually fits your planned area. For my shirts I picked a 2 inch candy corn file.
Add text and position to embroider names with a machine
- Click the Lettering tool the big A on the top tool bar on the right of the screen. Choose a font you installed that is digitized for embroidery. I am using Design by JUJU Font Levi. Type the name in the text box and press Enter.
- With the mouse drag the name and the motif to the layout you like. Use the alignment guides or eyeball for small shirts. Keep spacing between the motif and lettering to avoid overlapping jump stitches unless you want them merged. This will help you get better result when you are embroider names with a machine or any letters
- Adjust font size until the name looks proportional to the motif. Use the presets if the font is a BX style so stitches are optimized. If necessary, change letter spacing to prevent letters from touching.
Print placement guides
Embrilliance can print a true to size placement guide with crosshairs. Go to File – Print and print the design at actual size. Use these guides to align on the shirt. The crosshairs are accurate and will match the machine trace lines when you use the camera or trace feature on multi needle machines.
Save your file
- File – Save Stitch File As. Save as PES or the format your machine accepts. Name it clearly like Quincy_Candycorn.PES.
- Copy the PES file to a USB drive or use wireless transfer if your machine supports it. Embrilliance can also send via Wi-Fi to compatible Brother or Babylock machines when on the same network.
Step 7 – Multi needle machine setup and needle threading tips
Preparing the multi needle machine for a multi color small design is simple once you know the steps. Below I give the full setup I use on a Brother six needle machine. The same approach applies to other brands. I hope so far the tutorial is clear and you are happy learning how embroider names with a machine, but if you have any question I have a Facebook group you can join
Clean and oil the hook area
- Turn the machine on. Remove the bobbin case and use compressed air to clear lint around the hook. Be careful not to blow dust deeper if the machine was previously heavily used. Use gentle bursts of air.
- On the machine screen choose the maintenance or needle icon and select the oil option. The machine will expose the hook area. Add a drop of sewing machine oil to the indicated hook area. This keeps the hook lubricated and prevents stitch issues.
Threading and changing one needle at a time
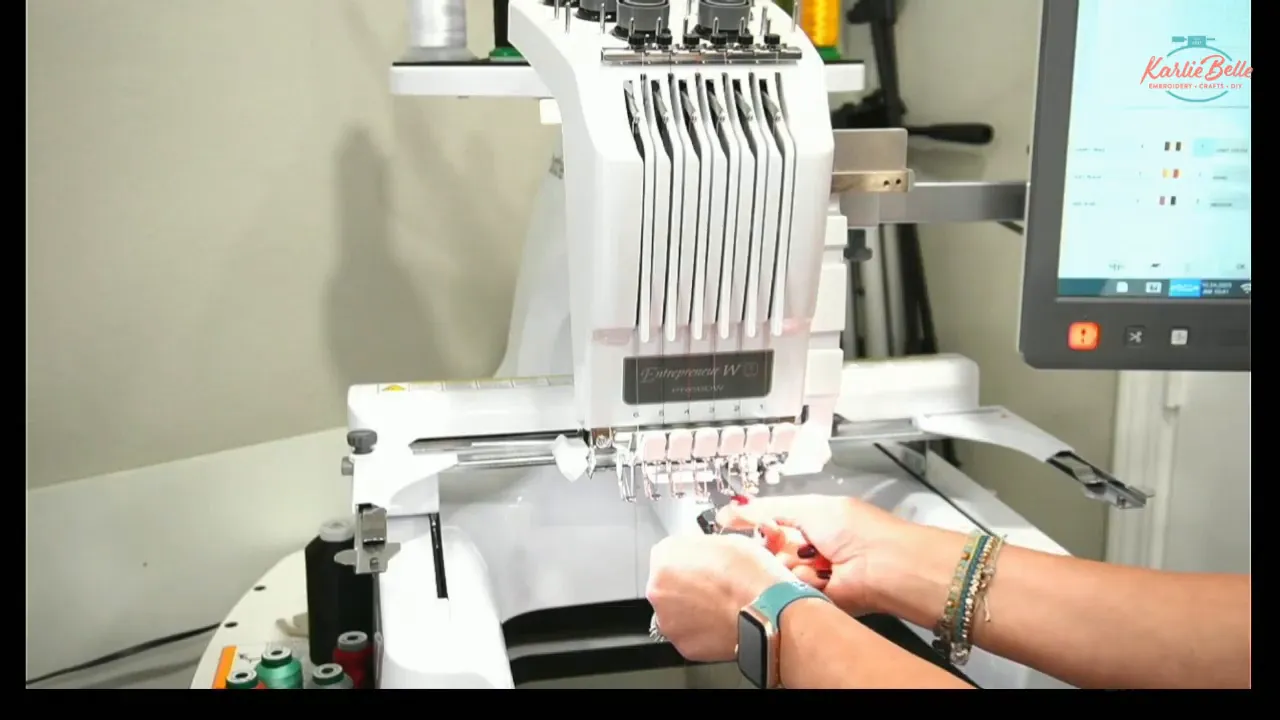
When adding or changing thread on a multi needle machine you do not have to rethread all needles. Cut the thread, tie the new spool to the old one with a small knot and pull through to the needle area. Then use the automatic needle threader for that needle.
- On the touch screen select the needle number you will change. The head will move to that needle position for easy access.
- Cut the old thread near the spool, tie the new spool thread to the old thread and pull through the path until it emerges at the needle area.
- Use the auto needle threader to thread the needle. Test by trimming a small tail and pulling until the knot passes through the tension discs and the path is clear.
Assign steps to needle numbers
Load your design to the machine. The screen will show each color step. The machine might not know which spool is at each needle. Use the color spool magnifier on the screen to map each stitch step to the correct needle. For example, if step one is yellow and your yellow thread is on needle one, ensure step one is assigned to needle one. Do this mapping before stitching.
Use two point positioning and trace
If you floated the shirt and the hooped stabilizer is misaligned, use the machine two point positioning system. It allows you to align two points on screen to two marks on the shirt. After mapping two points, press trace to see the laser outline and confirm it will not hit the metal frame. If the outline touches the metal frame or is too close, choose a bigger frame or adjust placement. It will also help you embroider names with a machine clearly
Step 8 – Add water soluble topper and start stitching
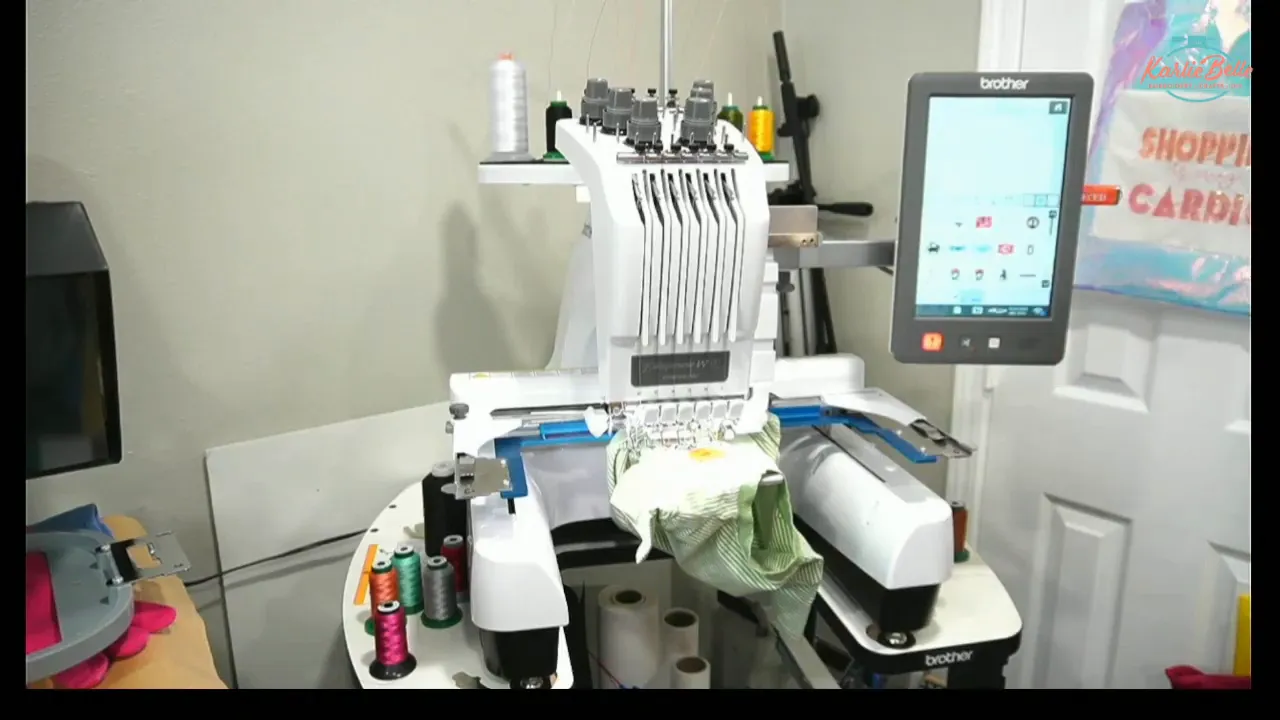
- Before final start, cut a small piece of water soluble topper and lightly tape or clip it to the shirt over the stitching area. Make sure the tape is outside the needle path.
- Confirm the machine colors are assigned to the right needles and confirm the trace outline is clear of metal edges.
- Hit Lock and press Start. The machine will stitch automatically and change colors between needles.
Tip: If you need to stop for an applique placement or to reposition, use the stop hand icon to add thread stops between steps so the machine pauses for your intervention.
Step 9 – Clean the embroidery and finish
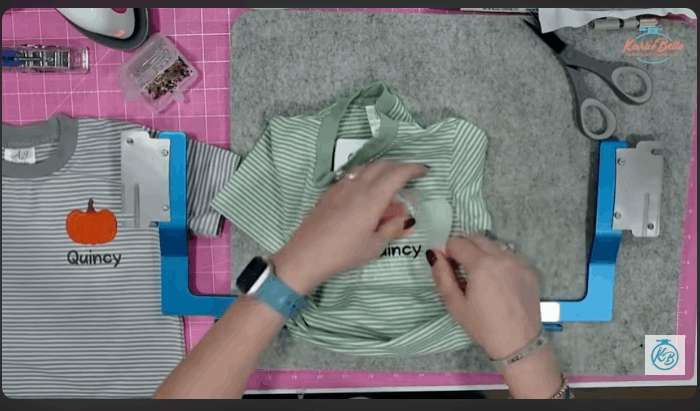
When stitching completes, remove the frame from the machine. Peel away the water soluble topper gently with tweezers. If small bits remain, a light rinse or wet cloth can remove residue. Pull the sticky tearaway away from the center and tear around the stitches. The fusible no-show poly mesh should stay attached to the shirt. Trim the poly mesh close to the embroidery, leaving a curved edge with no sharp corners to prevent peeling or a hard point. I aim for a rounded shape around the stitching and cut smoothly.
Apply fusible soft interfacing
- Cut the soft fusible interfacing a little larger than the trimmed poly mesh and with rounded edges.
- Place adhesive side down onto the trimmed stabilizer and press with a dry iron or heat press. Start in the center and work outward to avoid trapping bubbles. Use a pressing cloth if you are concerned about scorching or for delicate fabrics.
- Allow to cool and verify adhesion. If it lifts after washing, re-press.
Tip: If your shirt is white and your embroidery uses very dark thread, press carefully so you do not see stray dark threads showing through the fabric. Also watch for the interfacing shrinking if over heated. Short presses work best.
Step 10 – Troubleshooting and machine care tips
- Automatic needle threader problems can require service if the threader gets misaligned. Check manual alignment steps and if needed take the side panel off or consult a service center. Many issues are small mechanical adjustments.
- If your machine needle breaks, stop immediately. Check threading path and bobbin, ensure you used the right size needle and add oil to the hook if it is dry.
- Clean the bobbin area regularly. If you use compressed air, be careful to avoid pushing lint deeper into the machine.
- For machines that accept cards instead of USB, you can still load designs using card readers or card writers that are available on sites like eBay for older models.
Examples and variations
You can use this same workflow for many designs. Replace the candy corn with a small pumpkin, a bat, a small truck, Santa motif, or a letter initial. Use the same stabilizer combo and finishing technique. If you plan holiday shirts ahead of time, order shirts in the color you want and stitch for the next holiday so shipping and gift giving timelines work. Especially, it will help you embroider names with a machine beautifully.
Conclusion
Embroider names with a machine is easy once you break it down into steps. The keys are stabilizer selection, precise placement, careful hooping or floating, mapping color steps to needle numbers, and finishing with a soft fusible interfacing. Use a water soluble topper on knits to get crisp satin edges, fuse a poly mesh on the inside for stability, and use a sticky tearaway on top when floating with Durkee EZ Frames. If you prefer not to use sticky, clips and spray adhesive on cutaway will work. Embrilliance Essentials makes layout and printing true to size easy, and the multi needle machine’s two point positioning and trace feature are lifesavers if your hoop is slightly crooked. Finally, finish with Fuse So SoSoft or similar soft backing to keep the embroidered area comfortable for kids. After you learn to embroider names with a machine, if you are up for another challenge, check out how to make a Halloween-themed purse
If you follow these steps and practice on a scrap shirt first, you will gain confidence quickly. These mini projects are fast, satisfying, and make adorable gifts. Have fun experimenting with themes for holidays or everyday designs. Happy stitching!
PIN IT
OTHER LINKS
🪡 Learn more about my beginner course on machine embroidery, From Start to Stitch
💻 Enroll in my course Embroidery Essentials
💻 Enroll in my course Enthusiast
❤️ Join my Sip & Stitch Squad VIP Membership
🧵 Join my Facebook Group for discussion and help on machine embroidery and crafting
Thanks for stopping by!