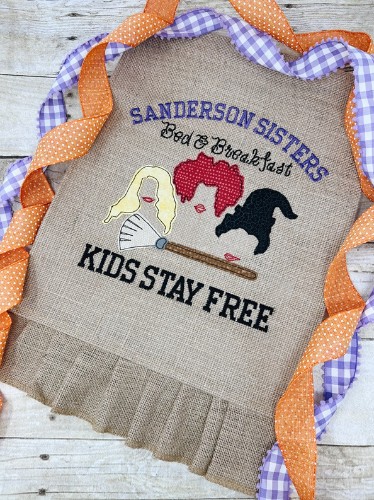
Hocus Pocus is my all time favorite Halloween movie. When I found out a sequel was being release in Sept of 2022, I was excited like a kid in a candy shop 😂. To celebrate this awesome occasion, I want to make a Sanderson Sister’s Bed & Breakfast Garden Flag. I remembered admiring a witch trio applique at Marmiebee Designs and thought that would be perfect for my garden flag. I will be doing this project on my Baby Lock Altair using the large 9.5 x 9.5 inch hoop. The witch applique design also comes in a 5×7 size option so that you can tailor this project to fit the machine and hoop size you have.
This post contains affiliate links and I will receive a small commission if you make a purchase after clicking on my link. All opinions are my own and I only promote products that I use and love.
Hocus Pocus Garden Flag Supplies:
- Witch Trio Applique
- Fonts used
- Embrilliance Essentials
- Burlap Garden Flag
- Tear Away or Wash Away stabilizer
- Spray Adhesive
- Water Soluble Topper
- Disappearing Ink Fabric Marker
- Fabric for Applique
- Heat n Bond Lite
- Mini Iron
- Wool Pressing Mat
- Applique Scissors
- 75/11 Ball Point Needle
- Embroidery Thread
- Pre-wound Bobbin
Step 1: Plan Your Garden Flag Layout
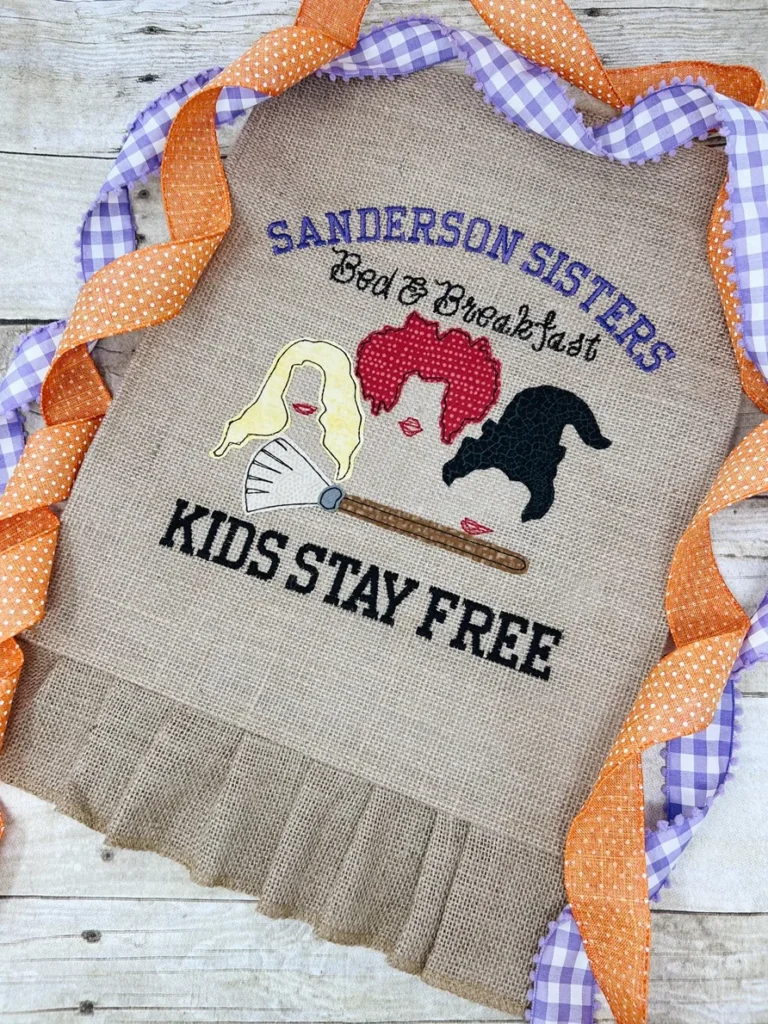
Start by arranging your embroidery halloween designs around the wording “Sanderson Sisters Bed and Breakfast—Kids Stay Free.” The witch trio goes in the middle, the curved heading sits above it, and the bottom lettering finishes off this fun Hocus Pocus garden flag!
I stitched mine on my Baby Lock Altair using the 9.5 × 9.5-inch hoop. That gives me room to combine the applique and lettering into one hooping. However, you can absolutely make a similar flag with a 5×7 machine, including a Brother PE800. You’ll just separate the layout into three hoopings, which we’ll go over below.
The Witch Trio with Broom applique from Marmiebee includes the witches, broom, and little lips. The lettering is not included. We’ll add that ourselves using embroidery fonts in Embrilliance Essentials.
Before combining embroidery halloween designs with lettering, measure the usable area of your flag. Keep the design above the bottom ruffle and below the hanging sleeve. Your embroidery needs to fit both the machine’s stitching field and the space available on the actual flag.
Step 2: Add and Curve the Lettering in Embrilliance
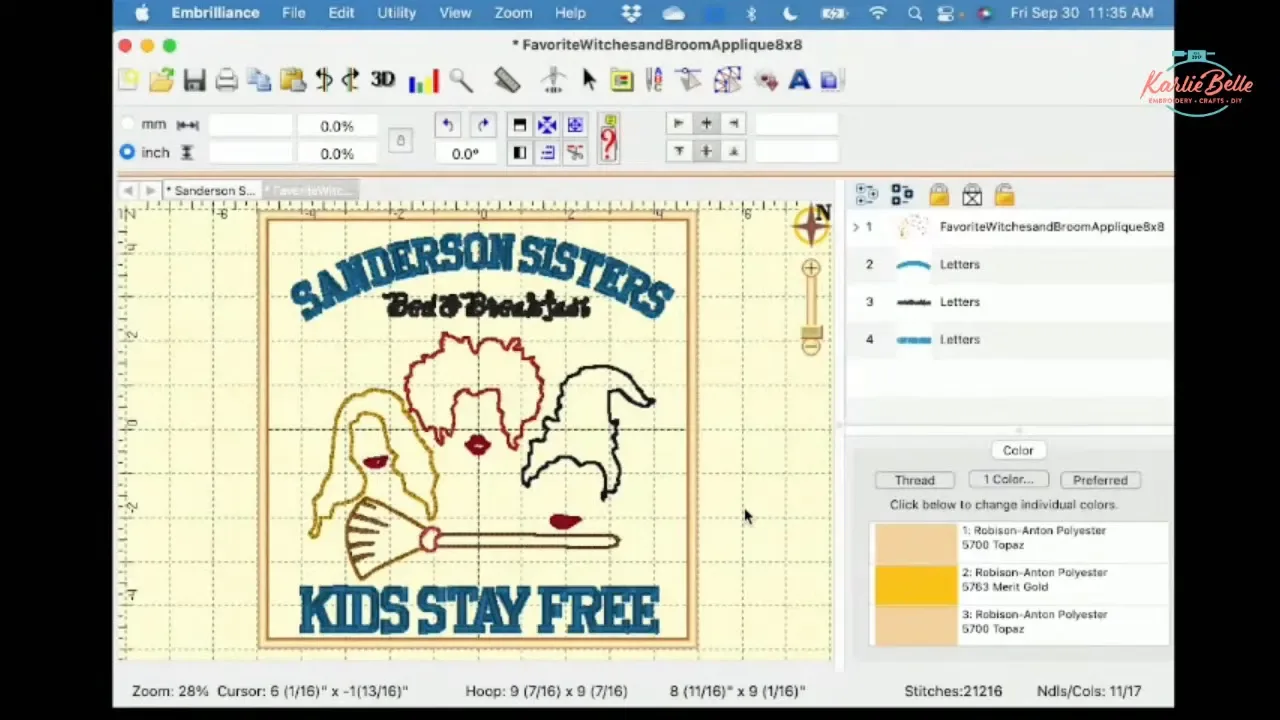
Open Embrilliance Essentials and choose your hoop in the Preferences → Hoops window. For the large square layout, I selected the 240 × 240 mm hoop. Then open the witch applique file that fits your planned arrangement.
This is where embroidery halloween designs become completely customizable. You can combine a purchased applique with fonts you already own instead of looking for one finished file with every word included.
- Select the lettering tool and type Sanderson Sisters.
- Choose the Varsity font from Creative Appliques.
- Click the circular lettering option to curve the heading.
- Adjust the curve control until the words form an arch above the witches.
- Add a separate lettering object for Bed and Breakfast.
- Switch that line back to straight lettering and choose Madeline from Designs by JuJu.
- Add KIDS STAY FREE in all capitals using Varsity again.
Use the hoop’s centerline and the selection handles to help center each section. Adjust the font size and spacing until the wording looks balanced around the applique.
For embroidery halloween designs with several lettering sections, check the thread-color assignments too. If you want the machine to stop between consecutive sections, assign different colors in the software—even if you intend to stitch both sections with black thread.
My Embrilliance software guide explains the different programs if you need help understanding where Essentials fits into your embroidery workflow.
Step 3: Hoop the Stabilizer and Mark Your Placement
For this flag, we are floating the burlap rather than hooping it. That means only the tear-away stabilizer goes between the hoop rings. The flag will sit on top and attach with temporary adhesive.
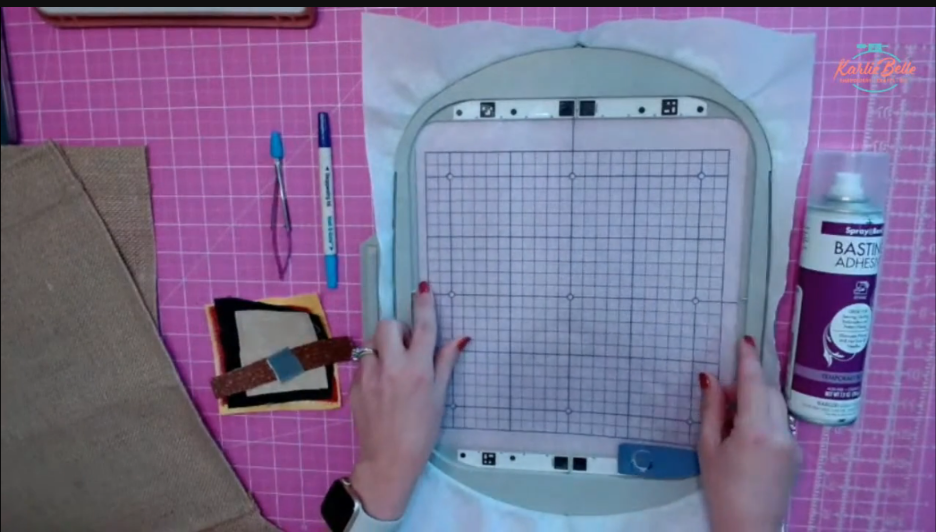
Hoop your stabilizer, then lay the hoop’s placement grid over it. Use the grid’s marking holes to make dots with your removable fabric marker. Connect those dots into horizontal and vertical crosshairs.
Next, lay the flag flat and place the same grid over it. Measure across the flag to find the horizontal center. Then measure the usable height, stopping above the ruffle, to decide where the center of the complete design should fall.
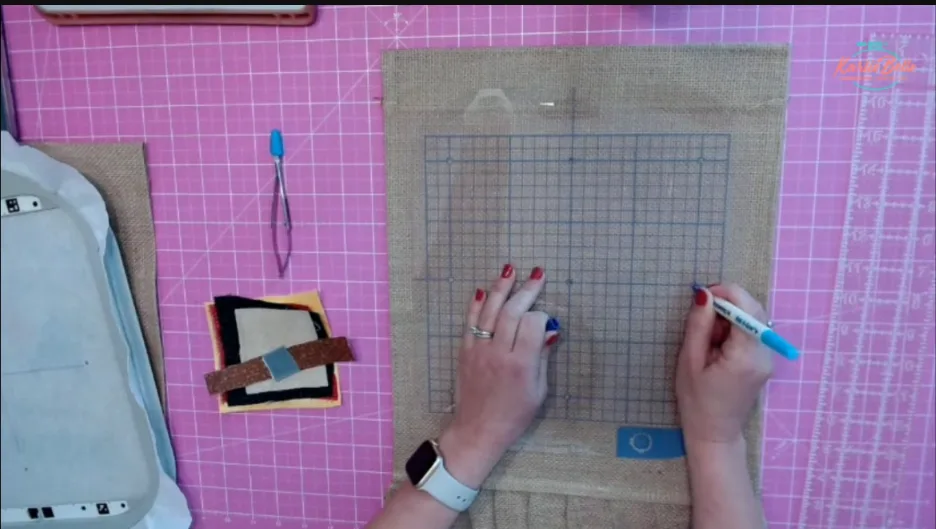
When placing embroidery halloween designs, don’t center everything based on the flag’s total length without considering its decorative edges. You want the embroidery centered within the area that will actually hold the stitching.
Mark the flag with matching crosshairs. These marks give you a clear way to line up the flag with the hooped stabilizer and check placement at the machine.
If you’re using three hoopings, you’ll mark a separate center for each section. The same placement method works for smaller embroidery halloween designs; the difference is that you repeat it for the top, middle, and bottom.
Step 4: Float the Flag and Check the Needle Position
Lightly spray the hooped stabilizer with temporary basting adhesive. Lay the flag over it, matching the crosshairs on the burlap to the crosshairs underneath.
I like to put my thumbs near the two side marks as I lower the flag into place. Then I check the vertical line and both sides before smoothing everything down. The adhesive is temporary, so you can lift the flag and reposition it if needed.
For larger embroidery halloween designs, take your time with this step. A straight centerline helps keep the heading, witches, and bottom wording aligned.
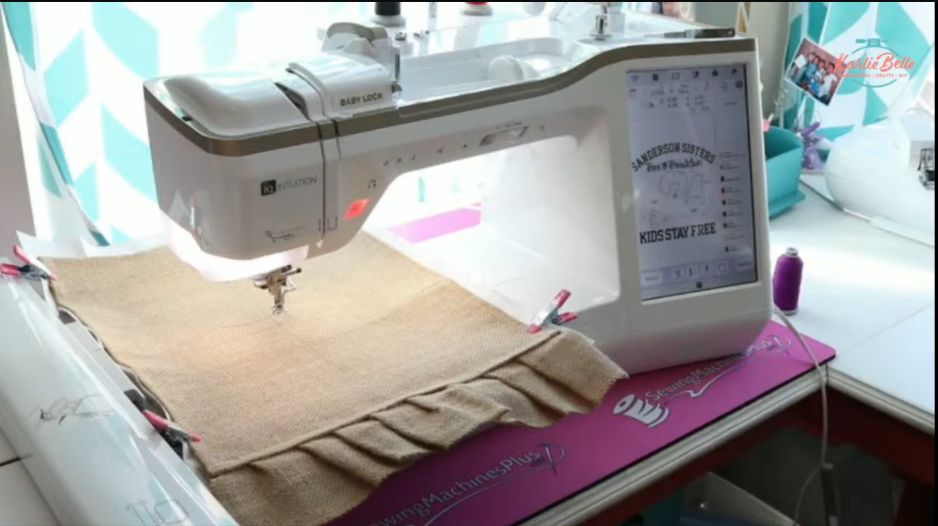
If you’re concerned about movement, add pins well outside the embroidery field or use clips that attach the flag to the stabilizer. Keep all pins and clips out of the needle’s path, and make sure clips won’t interfere with attaching or moving the hoop.
Load the hoop onto the machine and check the needle position against your marked center. On my Altair, I used the positioning controls to make a small adjustment.
Before starting embroidery halloween designs on a floated item, confirm that the flag lies flat and that nothing is caught underneath. Remove any clip that could get in the way as the hoop moves.
Step 5: Stitch the Hair Using the Two-Step Applique Method
This witch design uses a bean-stitch, raw-edge applique finish. It is different from the traditional three-step applique process because the tack-down and finishing stitches are combined.
Each fabric piece follows this sequence:
- Stitch the placement outline directly onto the flag.
- Cover the entire outline with your prepared applique fabric.
- Stitch the bean-stitch finishing outline.
- Trim the excess fabric just outside the stitching.
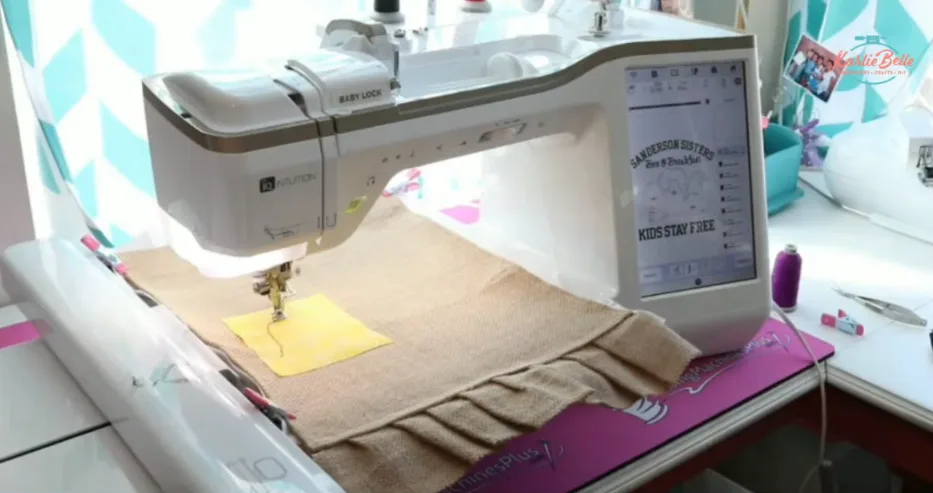
I used black thread for the hair outlines. The placement stitch will be covered, so its color isn’t important. However, the second stitch is visible, so load the thread color you want for the finished outline before running that step.
For these embroidery halloween designs, I backed the applique fabrics with Heat n Bond Lite before stitching and peeled away the paper before placing each piece. It helps support the fabric and gives a cleaner cut when trimming.
Work through the blonde hair, red hair, and black hair in the design’s sequence. Make sure each fabric piece covers its complete placement outline before starting the finishing stitch.
If you’re familiar with satin-edge embroidery halloween designs, remember that there won’t be another satin border covering your cuts here. My start-to-finish machine applique tutorial explains the traditional process for comparison.
Step 6: Trim the Applique Without Chasing Every Tiny Detail
Once a hair section finishes, remove the whole hoop from the machine if you need better access at your craft table. Leave the flag attached to the stabilizer so you don’t disturb its alignment.
Trim just a smidge outside the bean-stitch outline. You don’t need to reproduce every little jagged point in the hair with your scissors. The black stitching creates that detail, while your fabric edge can follow a smoother shape around it.
That is one of my favorite things about these embroidery halloween designs: the stitched outline does a lot of the decorative work for you!
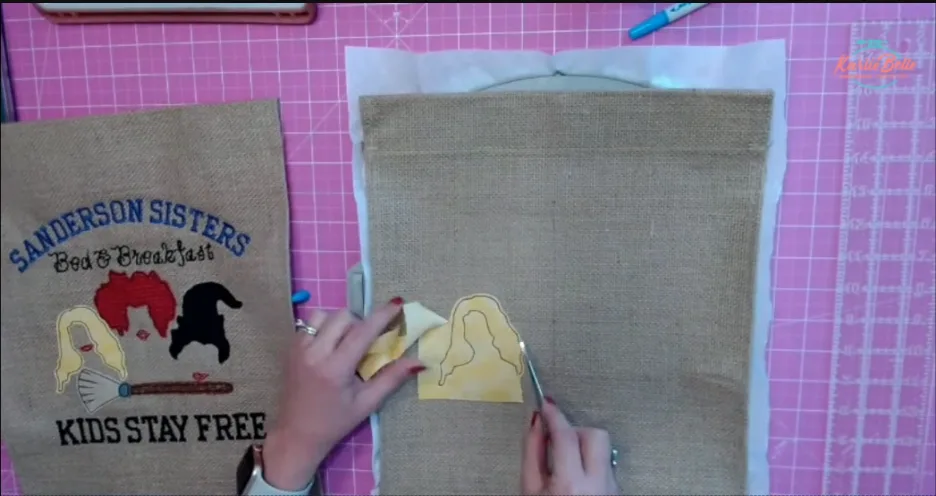
If you want to save time, trim the side closest to the next applique piece first. That clears the area where the next fabric needs to go. You can finish trimming the remaining edges later, as long as they won’t interfere with upcoming stitches.
A little overlap between neighboring pieces is fine where the design places them close together. Just be careful not to cut the stitching or the burlap underneath.
Black thread on black fabric can be harder to see. I still prefer matching the outline for this section, but you could choose a contrasting thread if you wanted it to stand out. With raw-edge embroidery halloween designs, choose the appearance you like rather than feeling that every piece must have the same contrast.
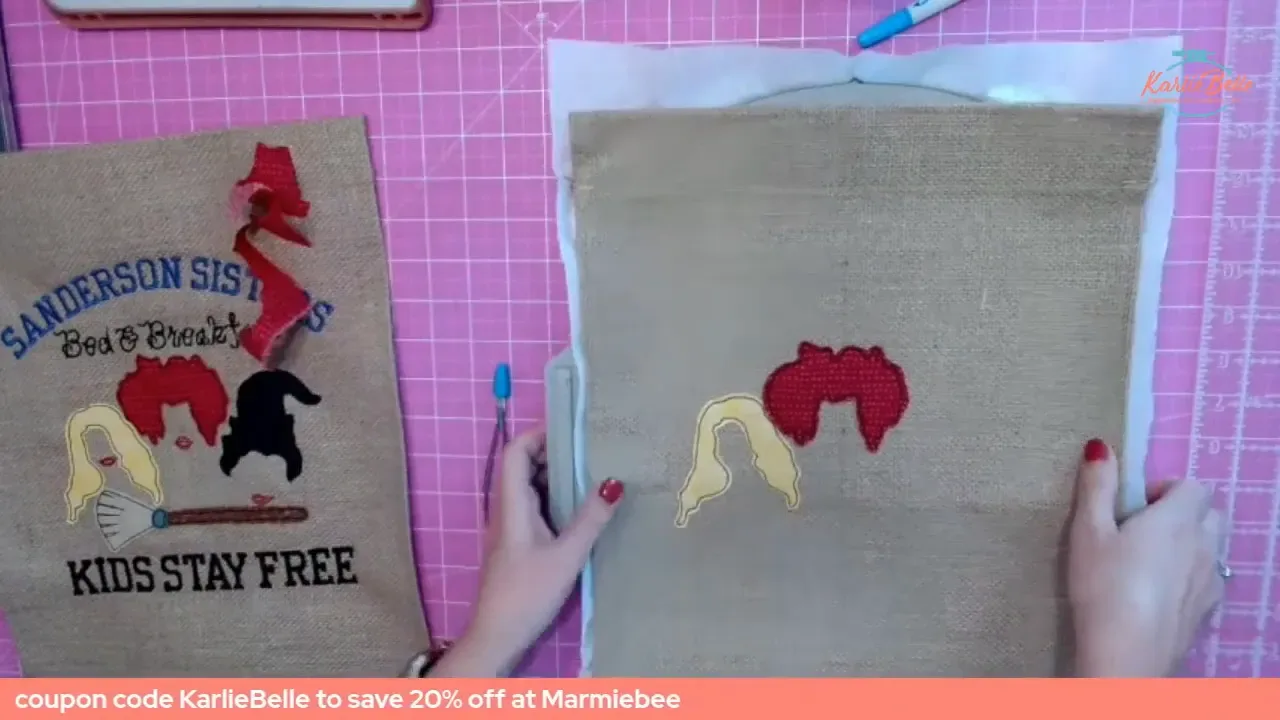
Step 7: Complete the Broom and Return to the Lips
After the hair, the file moves to the lips and then the broom. Since I’m using black thread for the applique outlines, I skip the lips temporarily and complete the broom first to save a thread change.
On the Altair, use the needle plus/minus control and the step-navigation arrows to move to the next color block. Check the preview to confirm that the broom placement outline is selected before starting.
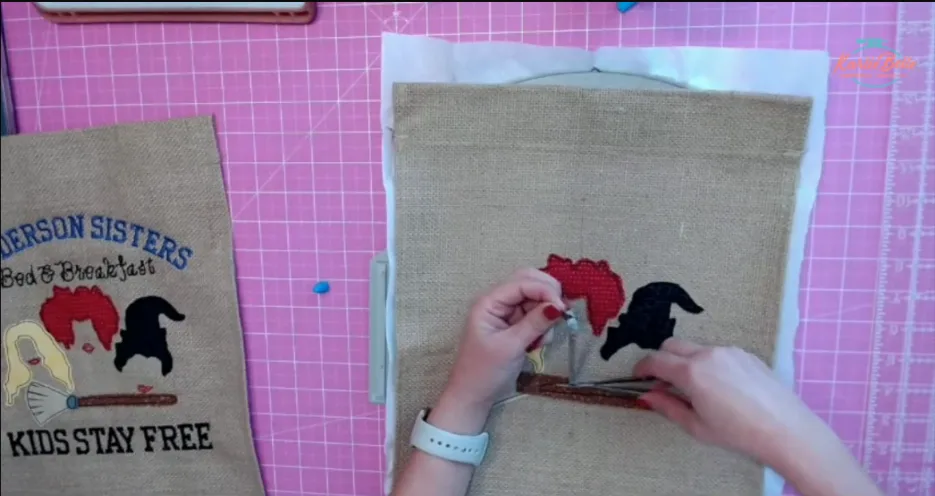
Continue the same placement, fabric, finishing stitch, and trimming process for the broom’s lower section, handle, and small accent piece.
The long, skinny handle fabric can shift easily. Use a little tape to hold it in place while stitching. Remove the tape afterward and trim the excess fabric.
Small pieces in embroidery halloween designs need the same full coverage as larger ones. Check that the fabric extends beyond every part of the placement outline before you start.
Stitch the broom details, then navigate back to the lips. Load red thread and stitch all three sets of lips. Afterward, advance past the completed broom steps to the lettering.
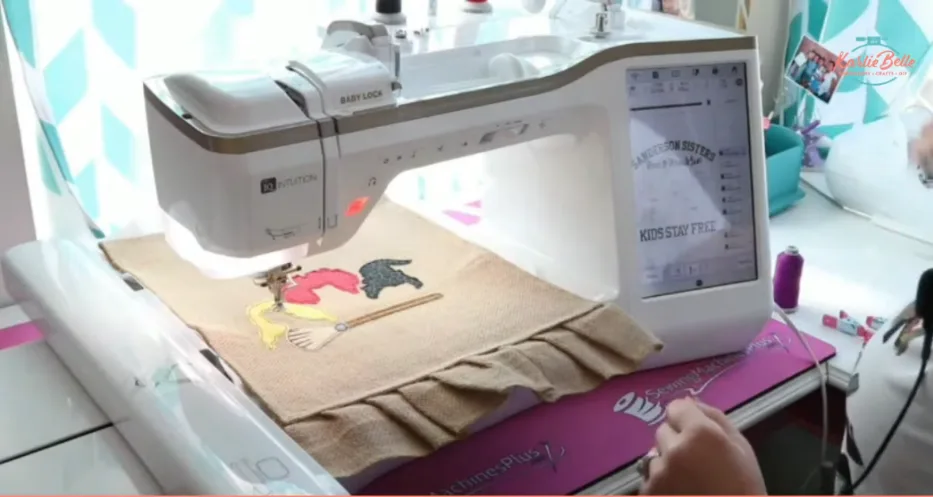
Always verify the next-step preview when changing the order. It’s easy to accidentally repeat a section. Also check for jump stitches between the broom details and trim them later if your machine doesn’t cut them automatically.
Step 8: Add Water-Soluble Topper Before Stitching the Words
I didn’t use water-soluble topper for the bean-stitch applique or the sketch-style lips. However, I do add it for the satin-stitch lettering so the words stand out better against the burlap texture.
Place one piece over the upper lettering area and another over the lower wording. Tape the topper down so it doesn’t pull or bunch as the stitches form.
The tape sticks better to the stabilizer than to the burlap, so extend it onto the exposed stabilizer where possible.
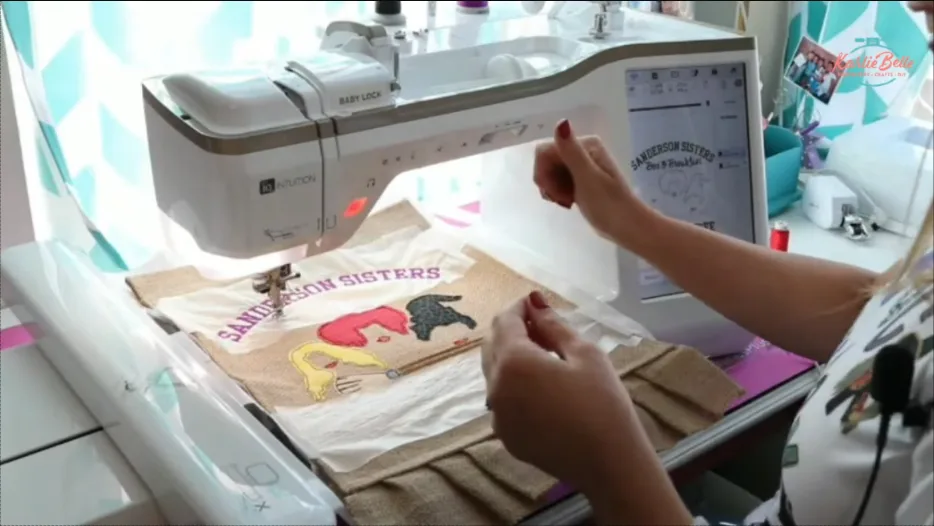
For my embroidery halloween designs color scheme, I stitched Sanderson Sisters in purple, then switched to black for Bed and Breakfast and Kids Stay Free.
This is the longest stitching portion of the project. My machine estimated approximately 43 minutes of stitching for the complete flag. The applique and details accounted for about seven minutes of machine stitching, while most of the remaining time went into the lettering.
Remember that the machine’s estimate doesn’t include your fabric placement, trimming, or thread changes. These embroidery halloween designs are beginner-friendly, but they aren’t a quick stitch-out simply because the applique itself is simple.
Step 9: Adapt the Flag for a 5×7 Hoop
If your machine has a 5×7 hoop, divide the project into three separate hoopings. You can still make a flag with a similar overall look without shrinking the complete design into one small stitching field.
Set the hoop to 130 × 180 mm in Embrilliance and rotate it horizontally. You can rotate it in Preferences or double-click the hoop-size display at the bottom of the workspace.
Separate your embroidery halloween designs into these sections:
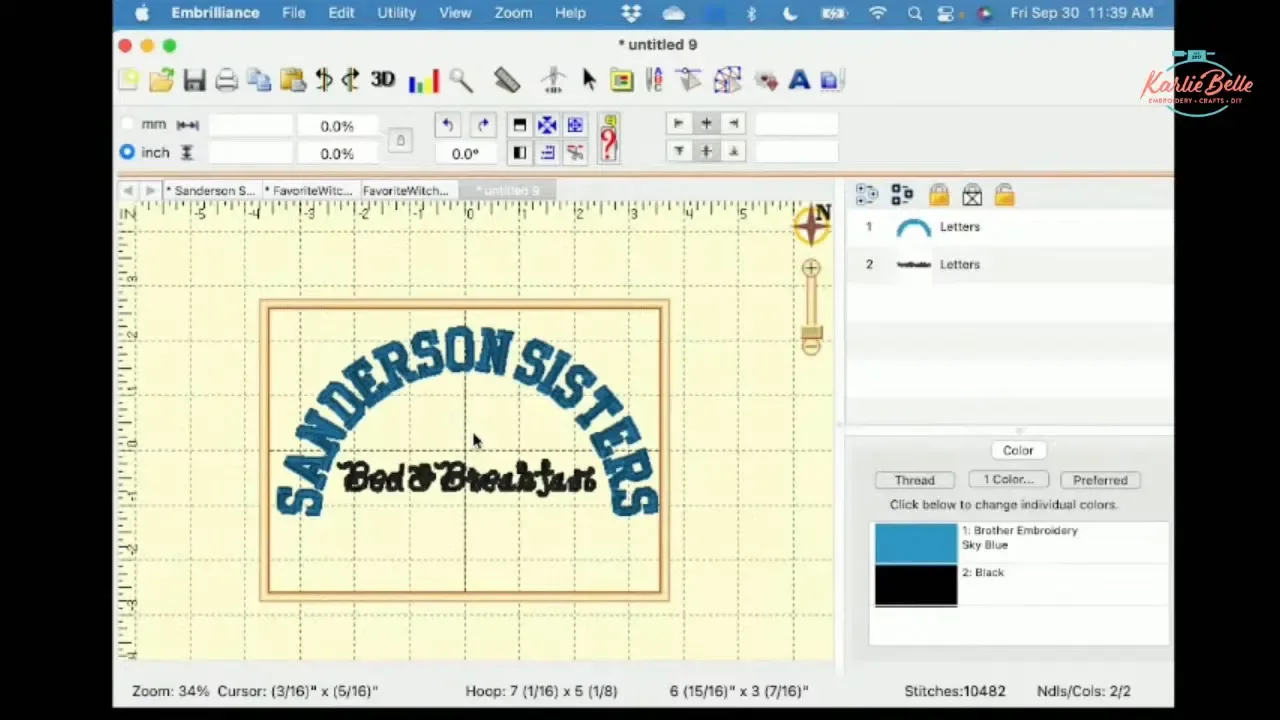
- Middle: the 5×7 witch trio and broom.
- Top: curved Sanderson Sisters lettering with Bed and Breakfast underneath.
- Bottom: Kids Stay Free.
Curve the heading more tightly to fit its width. If that leaves an open space, a small house or cauldron design could fill it, or you can enlarge Bed and Breakfast.
I suggest stitching the middle first so you can judge the spacing above and below it. However, starting at the bottom and working upward is another option if that makes your placement easier.
Measure the combined height before stitching. For example, two five-inch sections plus one inch of bottom lettering and one inch of spacing total twelve inches. With about fifteen inches of usable flag height, that leaves approximately an inch and a half at each end.
For embroidery halloween designs with resized lettering, keep changes modest. I demonstrated a roughly 15% width reduction on the bottom words and generally try not to exceed 20%. Mark each section’s center carefully, then float and align it using the same crosshair method.
Step 10: Clean Up and Finish Your Garden Flag
Once stitching finishes, remove the hoop from the machine and tear away as much water-soluble topper as you can. Spray the remaining bits with water and gently rub them away with a towel.
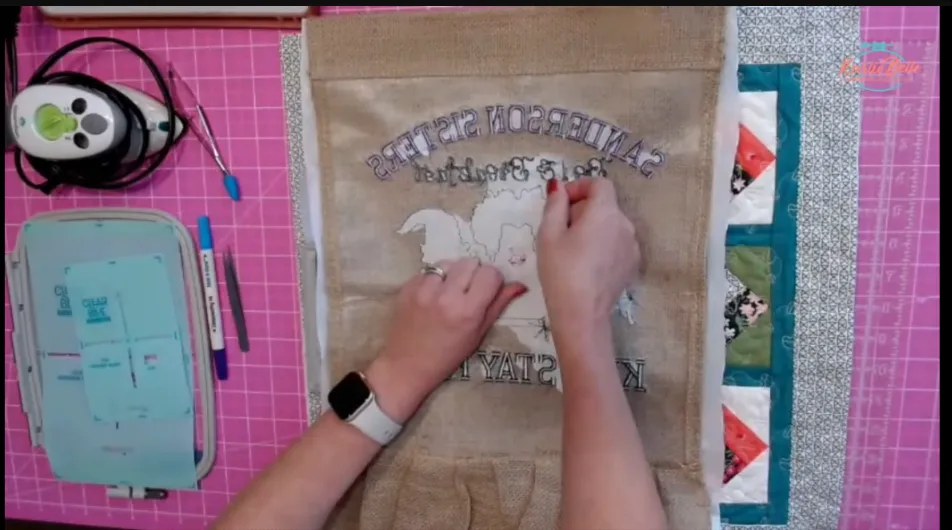
Release the flag from the tear-away stabilizer and remove the excess backing. I don’t worry about picking every tiny piece out from behind dense stitching because I position my flag with the front facing the sidewalk or road.
You don’t need to add a backing cover for this finish. Trim any visible jump stitches and remove the placement marks with water. I’ve also used a Tide pen for stubborn purple marks that didn’t disappear easily.
To finish these embroidery halloween designs, lightly press the applique pieces on a wool pressing mat to activate the Heat n Bond Lite. I don’t plan to wash my burlap flag, but fusing the fabric helps keep the applique attached neatly.
A small iron is helpful for precise pressing. I like the Cricut EasyPress Mini’s compact tip, base, and automatic shutoff feature.
You can also consider spraying the front and back with Scotchgard for a little weather protection. That is an optional finishing step, not a guarantee that the flag is fully weatherproof.
And that’s it, y’all! Your embroidery halloween designs have become a personalized Sanderson Sisters garden flag, ready to display or give to a Hocus Pocus-loving friend.
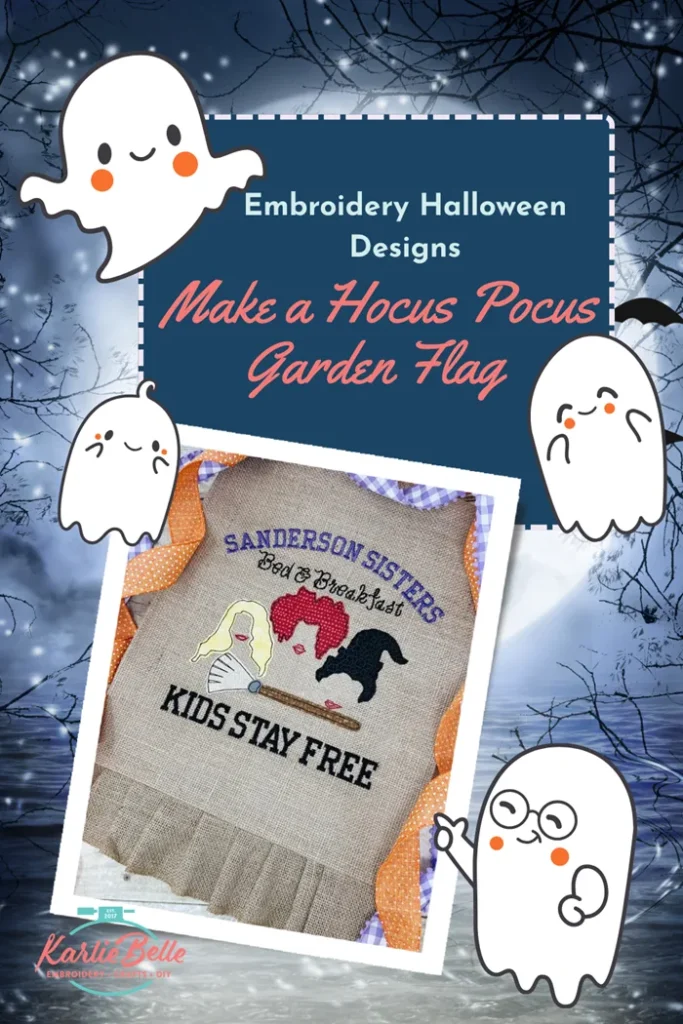
PIN IT
📣 Check out my current and past Sew Alongs
👩💻 Learn about my new course on how to use Embrilliance Enthusiast Embroidery Enthusiast
🪡 Learn more about my beginner course on machine embroidery, From Start to Stitch
💻 Enroll in my beginner software course Embroidery Essentials
❤️ Join my Sip & Stitch Squad VIP Membership
🧵 Join my Facebook Group for discussion and help on machine embroidery and crafting
Watch Live on Facebook – Click attending event so that you get notified when I go live!
Watch Live on Youtube – Make sure you are subscribed and click the bell to get notified when I go live!
Thanks for stopping by!