I love practical projects that help organize my work area, and a quilted fabric basket fits that purpose perfectly. This tutorial walks through every step I use to make a quilted fabric basket mostly in the embroidery hoop, with a simple finish on a sewing machine. I explain fabric choices, stabilizer and batting, hooping, trimming, basting, and the final assembly so you can confidently stitch your own quilted fabric basket.
Gathering Your Supplies
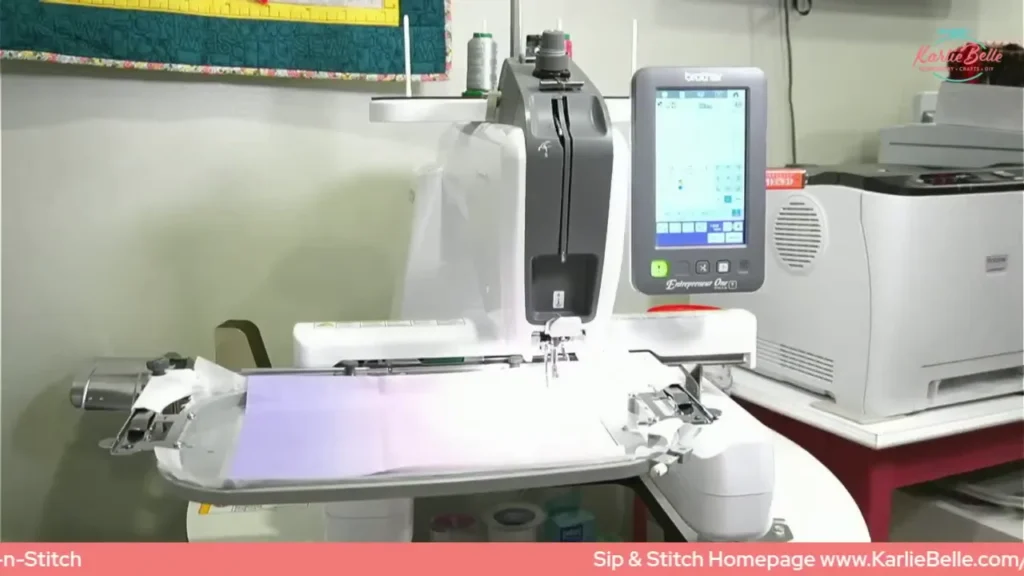
- I used my Brother PR1X free arm machine, however this project can be made on any embroidery that has a 5×7 hoop or larger
- Quilted Fabric Basket embroidery design from Sweet Pea
- 5×7 hoop or larger
- Cut Away Use coupon code “karliebelle” to save 10%
- Fabric for outer basket, lining, and top rim
- Quilt Batting Use coupon code “karliebelle” to save 10%
- Applique Scissors Use coupon code “karliebelle” to save 10%
- Organ 75/11 BP Needles Use coupon code “karliebelle” to save 10%
- Precision Tweezers
- Clover Stiletto Use coupon code “karliebelle” to save 10%
- Embroidery Thread Use coupon code “karliebelle” to save 10%
- Bobbins for Free Arm Machines Use coupon code “karliebelle” to save 10%
- Pre-wound Bobbins for Flat Bed Machines
- Sewing Machine
- I will be using my Juki TL-2010Q
- Iron
- I love my new Oliso mini iron!
Choosing the size and design
The quilted fabric basket comes in sizes from 5×7 up to very large hoops. If you have a 5×7 hoop, you can still make a useful basket. If you have a larger hoop such as 8×12, the basket will hold fat quarters and small projects. Pick plain, strip, or patchwork styles depending on how many fabrics you want visible on the outside. I prefer starting with the plain basket to learn the steps, then experimenting with strip or patchwork later.
Step 1 —Preparing your files and optional design edits
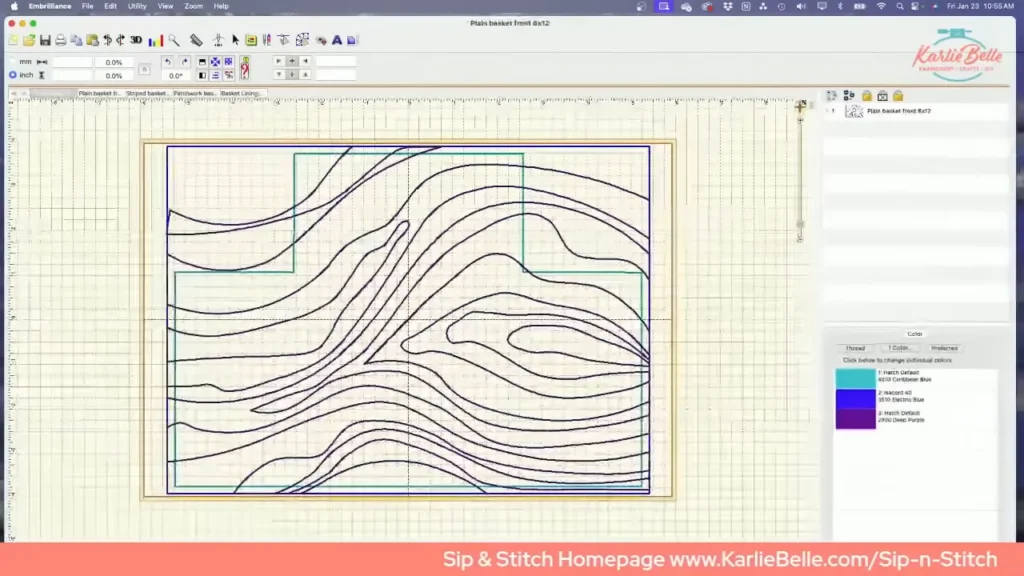
Load three files to your machine: the front file, the back file, and the lining file. You do not need editing software to stitch these files as they arrive, but having embroidery software like Embrilliance, lets you swap quilting fills or add lettering.
If you want a different quilting pattern on the basket, replace the quilting step in the front and back files with any quilting design that fits your hoop. Keep the quilting as step three so the sequence remains correct. You can also add a label or word to the side as a lettering step; place it so the fold-over top will not cover it and move it so that its step 4..
Step 2: Hoop stabilizer and prepare batting
Hoop a single layer of medium-weight cutaway stabilizer. Make sure the stabilizer is tight in the hoop with no wrinkles. Mark your hoop orientation with a small sticker or marker so you always slide it onto the machine the correct direction.
Cut batting slightly larger than the embroidered area. For a 5×7 hoop, a 7×9 piece of batting is easy to handle. For an 8×12, cut batting about 10×14. The key is that the batting covers the entire quilting area and extends past the perimeter stitch so you can trim after quilting.
Tip
If you want more structure, fuse Pelon SF101 to your outside fabrics before hooping. For the lining, poly mesh stabilizer makes folding and sewing easier than a heavy cutaway.
Step 3: Front hooping – batting, fabric, and quilting
- Place the batting on the hooped stabilizer. There is no tack-down stitch in these files for batting, so place the batting before stitching starts.
- Run the first perimeter step that stitches a placement or tack-down outline. This is to secure your fabric. Trim the batting around the perimeter with applique scissors as close to the stitch line as possible without cutting the stitches.
- Lay your outside fabric (fabric A) right side up on the hooped stabilizer and lock the hoop on the machine.
- Stitch the outer perimeter tack and the quilting fill. The quilting may be a wood grain or geometric design depending on the file you used. Quilting stitches are usually the last step in this front hooping.
 Batting on the hooped stabilizer
 Trim the batting
 Lay your outside fabric
 QuILTED DESIGN
Hooping and placement tips
- Use the trace feature on the machine to confirm the design fits in the hoop or use that as a placement guide if you ever worry the needle will hit the hoop.
- Use temporary adhesive spray or embroidery tape if the fabric shifts; for full-hoop coverage it usually stays put without extra adhesive.
- Use one thread color for all placement and quilting steps if you want a neat, cohesive look. It is faster and easy to change if desired.
Step 4: Back hooping and joining front to back
- Hoop stabilizer again and place batting as you did for the front. Stitch the placement and perimeter tack step, then lay the outside fabric down and stitch the quilting.
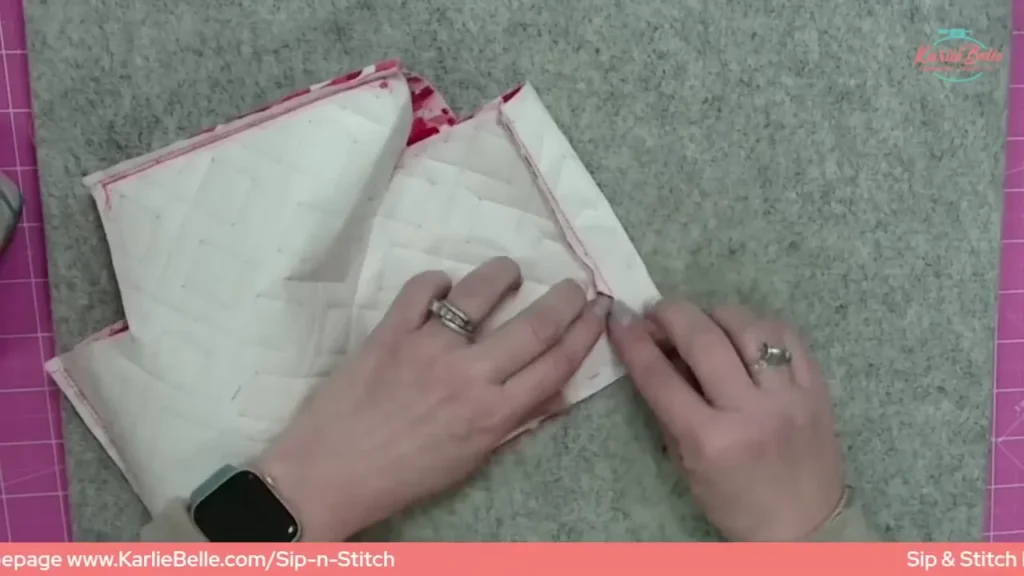
- Trim the batting for the back the return to hoop and stitch outer line and quilting. While that was happening on machine grab the front you already did. Then trim the front fabric to a half-inch seam allowance outside the stitch line when prompted. Use a ruler: align the stitch line to the half-inch mark and trim a uniform seam allowance all the way around.
- Take the front piece you trimmed earlier and place it right side down on top of the back piece that is still in the hoop. Align the perimeter stitch lines. Tape it in place if needed.
- The machine will stitch a long basting stitch around the entire perimeter next. This is intentionally long so you can remove and adjust if the alignment is not perfect.
- Once you are happy with the placement, the machine finishes with a heavy perimeter stitch that creates the box corners and secures front to back.
- Trim as before to 1/4 inch. this time include to box corners.
 Trim the batting
 trim the front fabric to a half-inch seam allowance
 Back is being STITCHED
 Notice the back piece lining
 place front piece on the back
 Align the perimeter stitch lines
Troubleshooting
If the bobbin runs out mid-stitch, stop, replace the bobbin, and rewind the stitch position a few steps using your machine’s stitch navigation. For Brother and similar machines use the needle symbol navigation to move back by 10-stitch increments then resume.
Step 5: Lining hooping
- Hoop stabilizer for the lining. I prefer poly mesh or a lightweight cutaway for the lining hooping because it folds easier and reduces bulk in the seam.
- Lay one piece of the lining fabric right side up and stitch the perimeter tack. Lay the second lining piece right side down on top and stitch to secure both pieces together. This creates a double-layer lining in a single hooping.
- Trim the lining piece to a quarter-inch seam allowance around the heavy stitch line and remove any excess stabilizer from the edges.
Step 6: Unpick basting stitches and trim box corners
The long basting stitches are there to make it easy to check placement. Unpick the long basting stitches on the top edge and the sides where the machine instructed. Remove all excess stabilizer around the pieces and trim seams back to the specified seam allowance:

- Front/back seams: trim to a 1/2-inch beyond stitch line during initial trimming, then later trim to a 1/4-inch when you prepare to sew the pieces together.
- Box corners: trim the corners at a 1/4-inch seam allowance so boxed corners reduce bulk inside the basket.
Step 7: Box the corners and prepare the fold-over band
- Press seam allowances open on both the outer basket and the lining. Open each corner, flatten, and align seams. Use a clip or pin to hold the boxed corner in place.
- Sew each boxed corner with a straight stitch about 1/4-inch from the raw edge. Backstitch at start and end to secure.
- For the fold-over top (fabric C), place the two cut pieces right sides together and stitch the short ends to form a ring. Press the seams open.
- Fold the long raw edges toward the wrong sides together and press to create a clean band. Clip the band so its seam aligns with the basket seam when you assemble.

Step 8: Final assembly and top stitching
- Turn the outer basket right side out and push the corners fully out.
- Insert the lining inside the basket with wrong sides together so you see the pretty sides of both fabrics. Align the seam of the lining with the seam of the outer basket. Clip.
- Place the folded band on top with the folded side down and raw edges up so the raw edges of the three layers meet at the top.
- Clip all the layers together around the entire top edge. Sew a quarter-inch seam allowance all the way around, removing clips as you go. Backstitch at start and end.
- Turn the band over the top to hide the raw edges. Press lightly and trim any loose threads.
Finished quilted fabric basket
Once you fold the top band over, the raw edges are hidden and the basket is complete. You can make several in different sizes for organizing thread, scraps, nursery items, or remotes. The quilting gives structure and a professional feel even if your sewing lines are not perfect.
Quick tips and reminders
- Hoop orientation: mark your hoop so you always slide it on the machine the same way.
- Stabilizer choice: medium-weight cutaway for structure; poly mesh for the lining to make folding easier.
- Batting placement: place batting before stitching begins if the design has no batting placement step.
- Use a single thread color: stitch quilting and tacking with the same color to speed the process and keep a cohesive look.
- Replace quilting fills: swap in any large quilting fill that covers the hoop area for a custom look.
- Adhesive options: temporary spray or tape helps stop fabric movement when needed.
- Pelon SF101: add to outside fabrics for a stiffer basket.
PIN IT

FAQ
What hoop size do I need to make a quilted fabric basket?
You need at least a 5×7 hoop for the smallest basket. Larger hoops like 8×12 make a basket that holds fat quarters or larger items.
Which stabilizer is best?
I recommend medium-weight cutaway for the front and back for structure. Poly mesh or tearaway are good choices for the lining for easier folding and softer seams.
Do I have to use batting?
Yes, batting for the front and back gives the quilted fabric basket its padded structure. Use two pieces—one for front and one for back—and trim them after quilting.
Can I change the quilting design?
Yes. Replace the quilting step in the design with any quilting fill that fits your hoop. Make sure it is positioned as the quilt step so the sequence of operations remains correct.
What if my lining becomes baggy?
If the lining feels baggy after assembly, you can resew side seams slightly narrower to take in excess fabric. Clip and adjust during final assembly to get smoother edges.
Can I add labels or lettering?
Yes, add lettering as an embroidery step on the front before the final assembly. Keep the size and placement in mind so the fold-over top does not cover the label.
Can I make the quilted fabric basket without an embroidery machine?
Yes, you can sew this basket entirely on a sewing machine, but the advantage of the in-the-hoop method is that the quilting and precise box-corner placement are stitched for you, which saves time and creates a consistent look.
If you try this project, I hope it becomes a favorite for organizing your sewing space. The quilted fabric basket is forgiving, useful, and quick to personalize. Make a set in matching fabrics and you’ll have an instant storage solution that looks great on any shelf.
Thanks for stopping by!